
Overview
3
Features of NAD Platform
4
Workflow
4
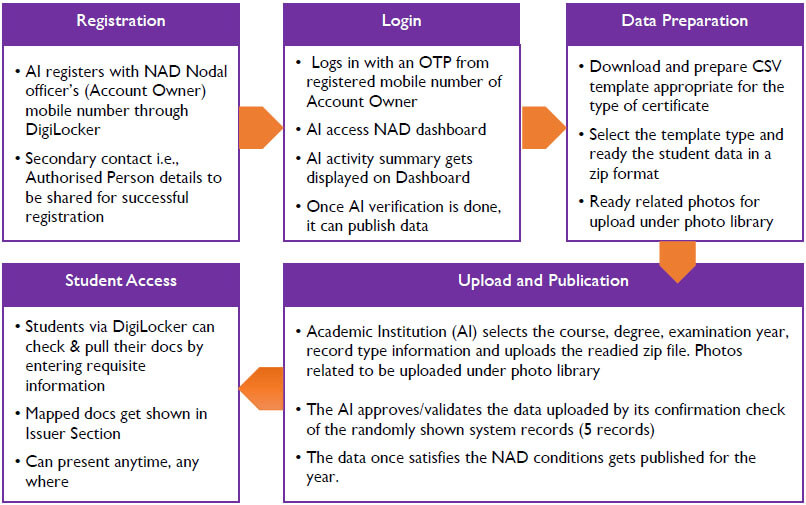
1. Registration
5
2. AI Dashboard
7
2.2. Records (Data Preparation & Upload)
9
• Records Section:
9
• Upload Status Section
14
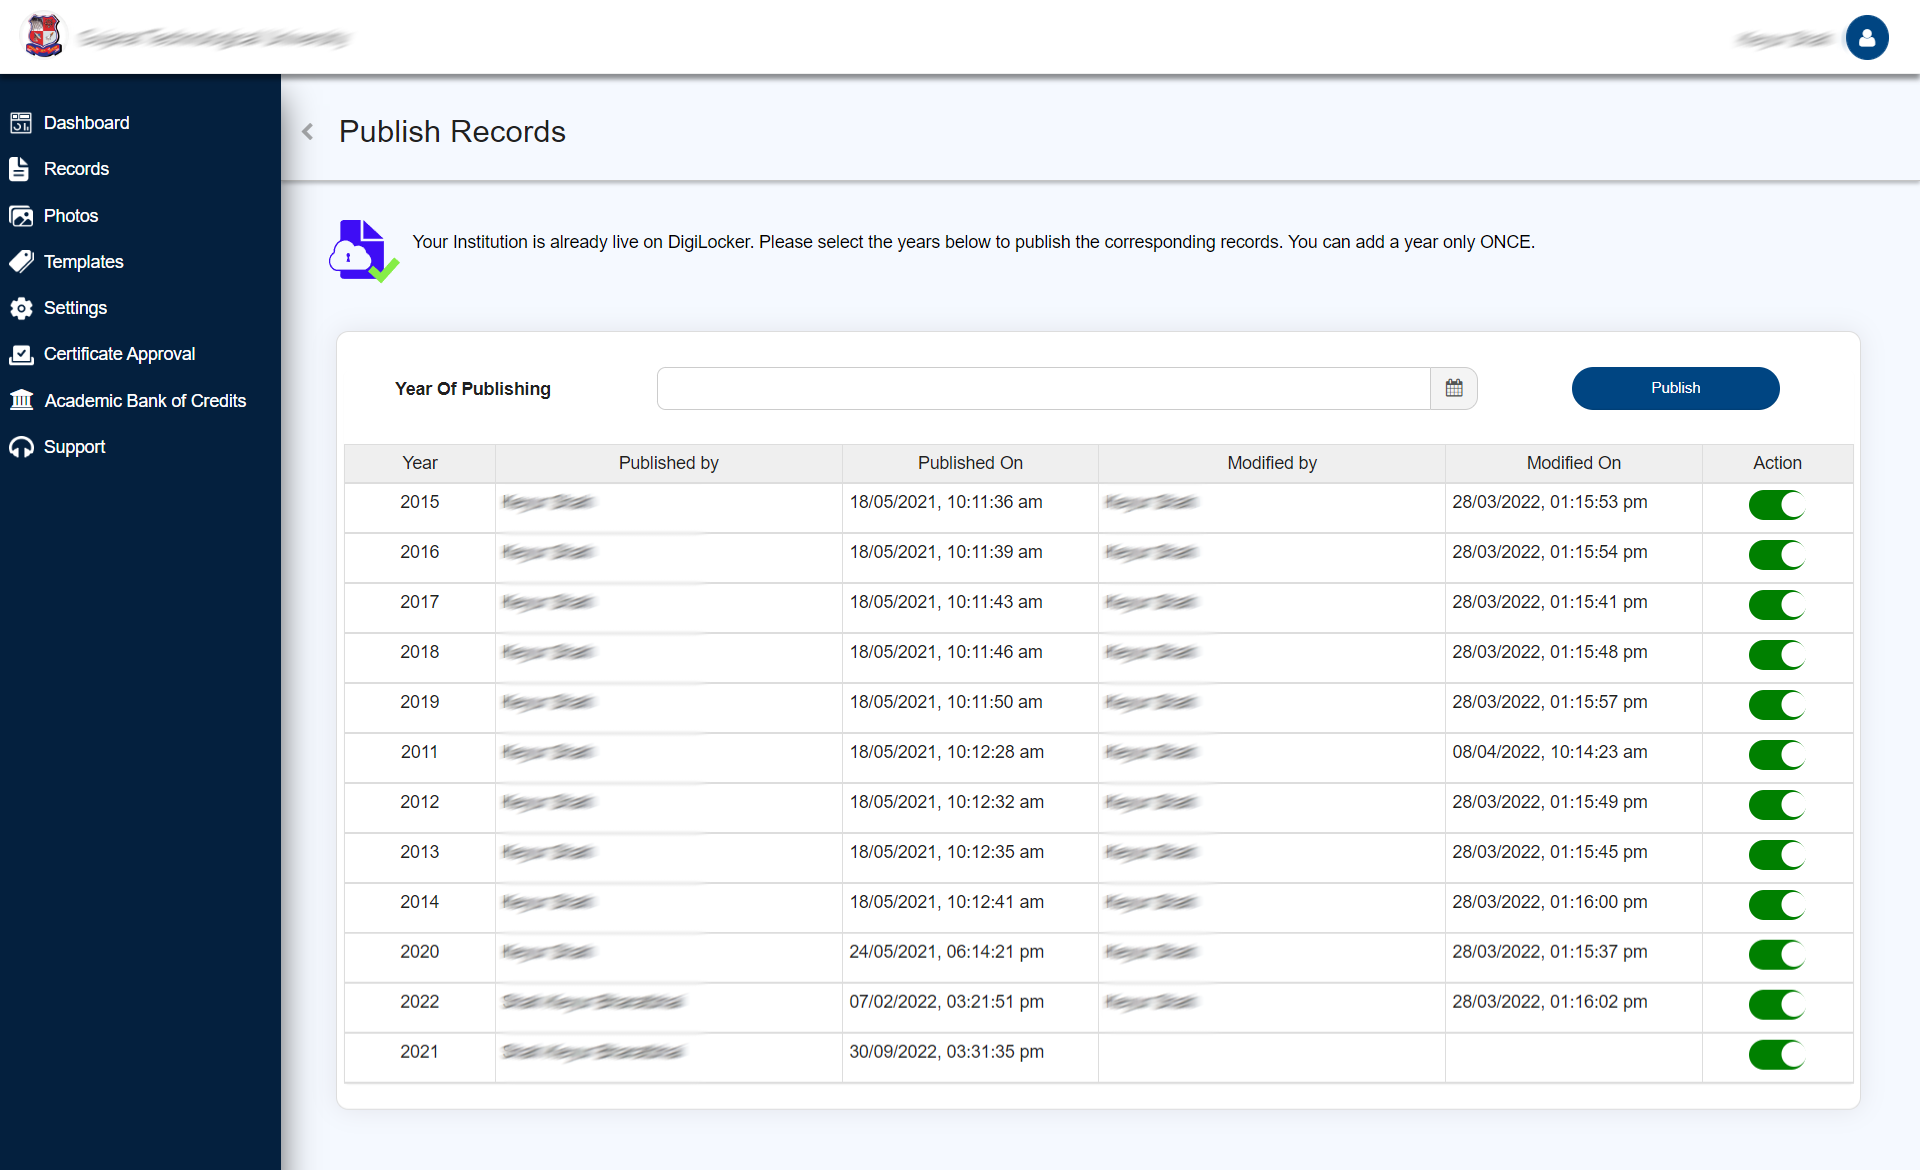
• Publish Records
14
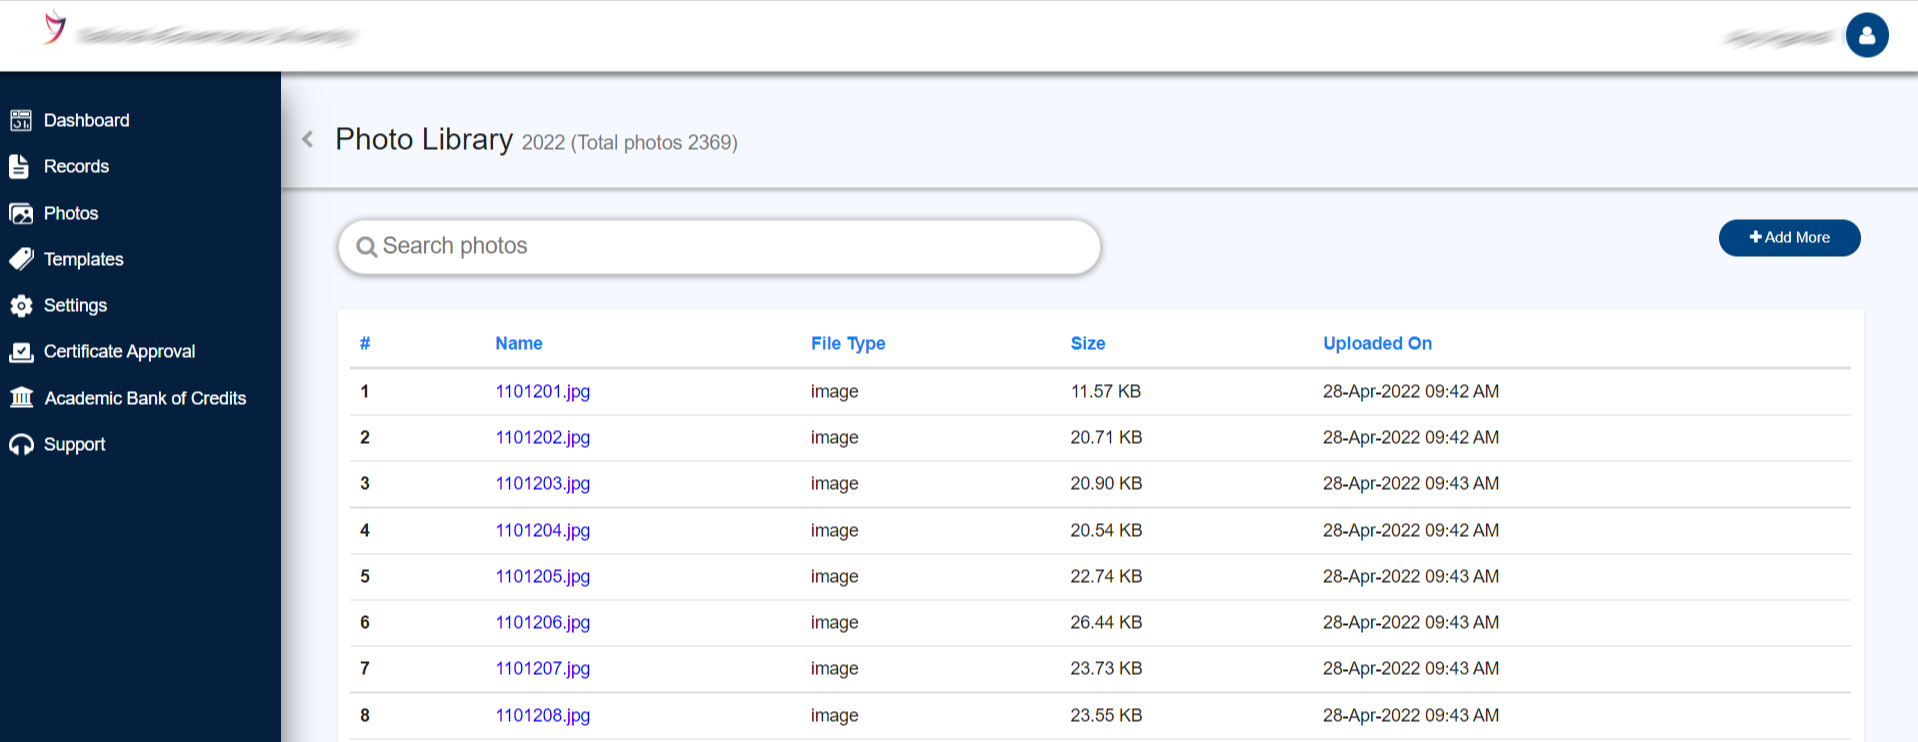
2.3. Photos (Student Images Upload)
14
• Photos Section
14
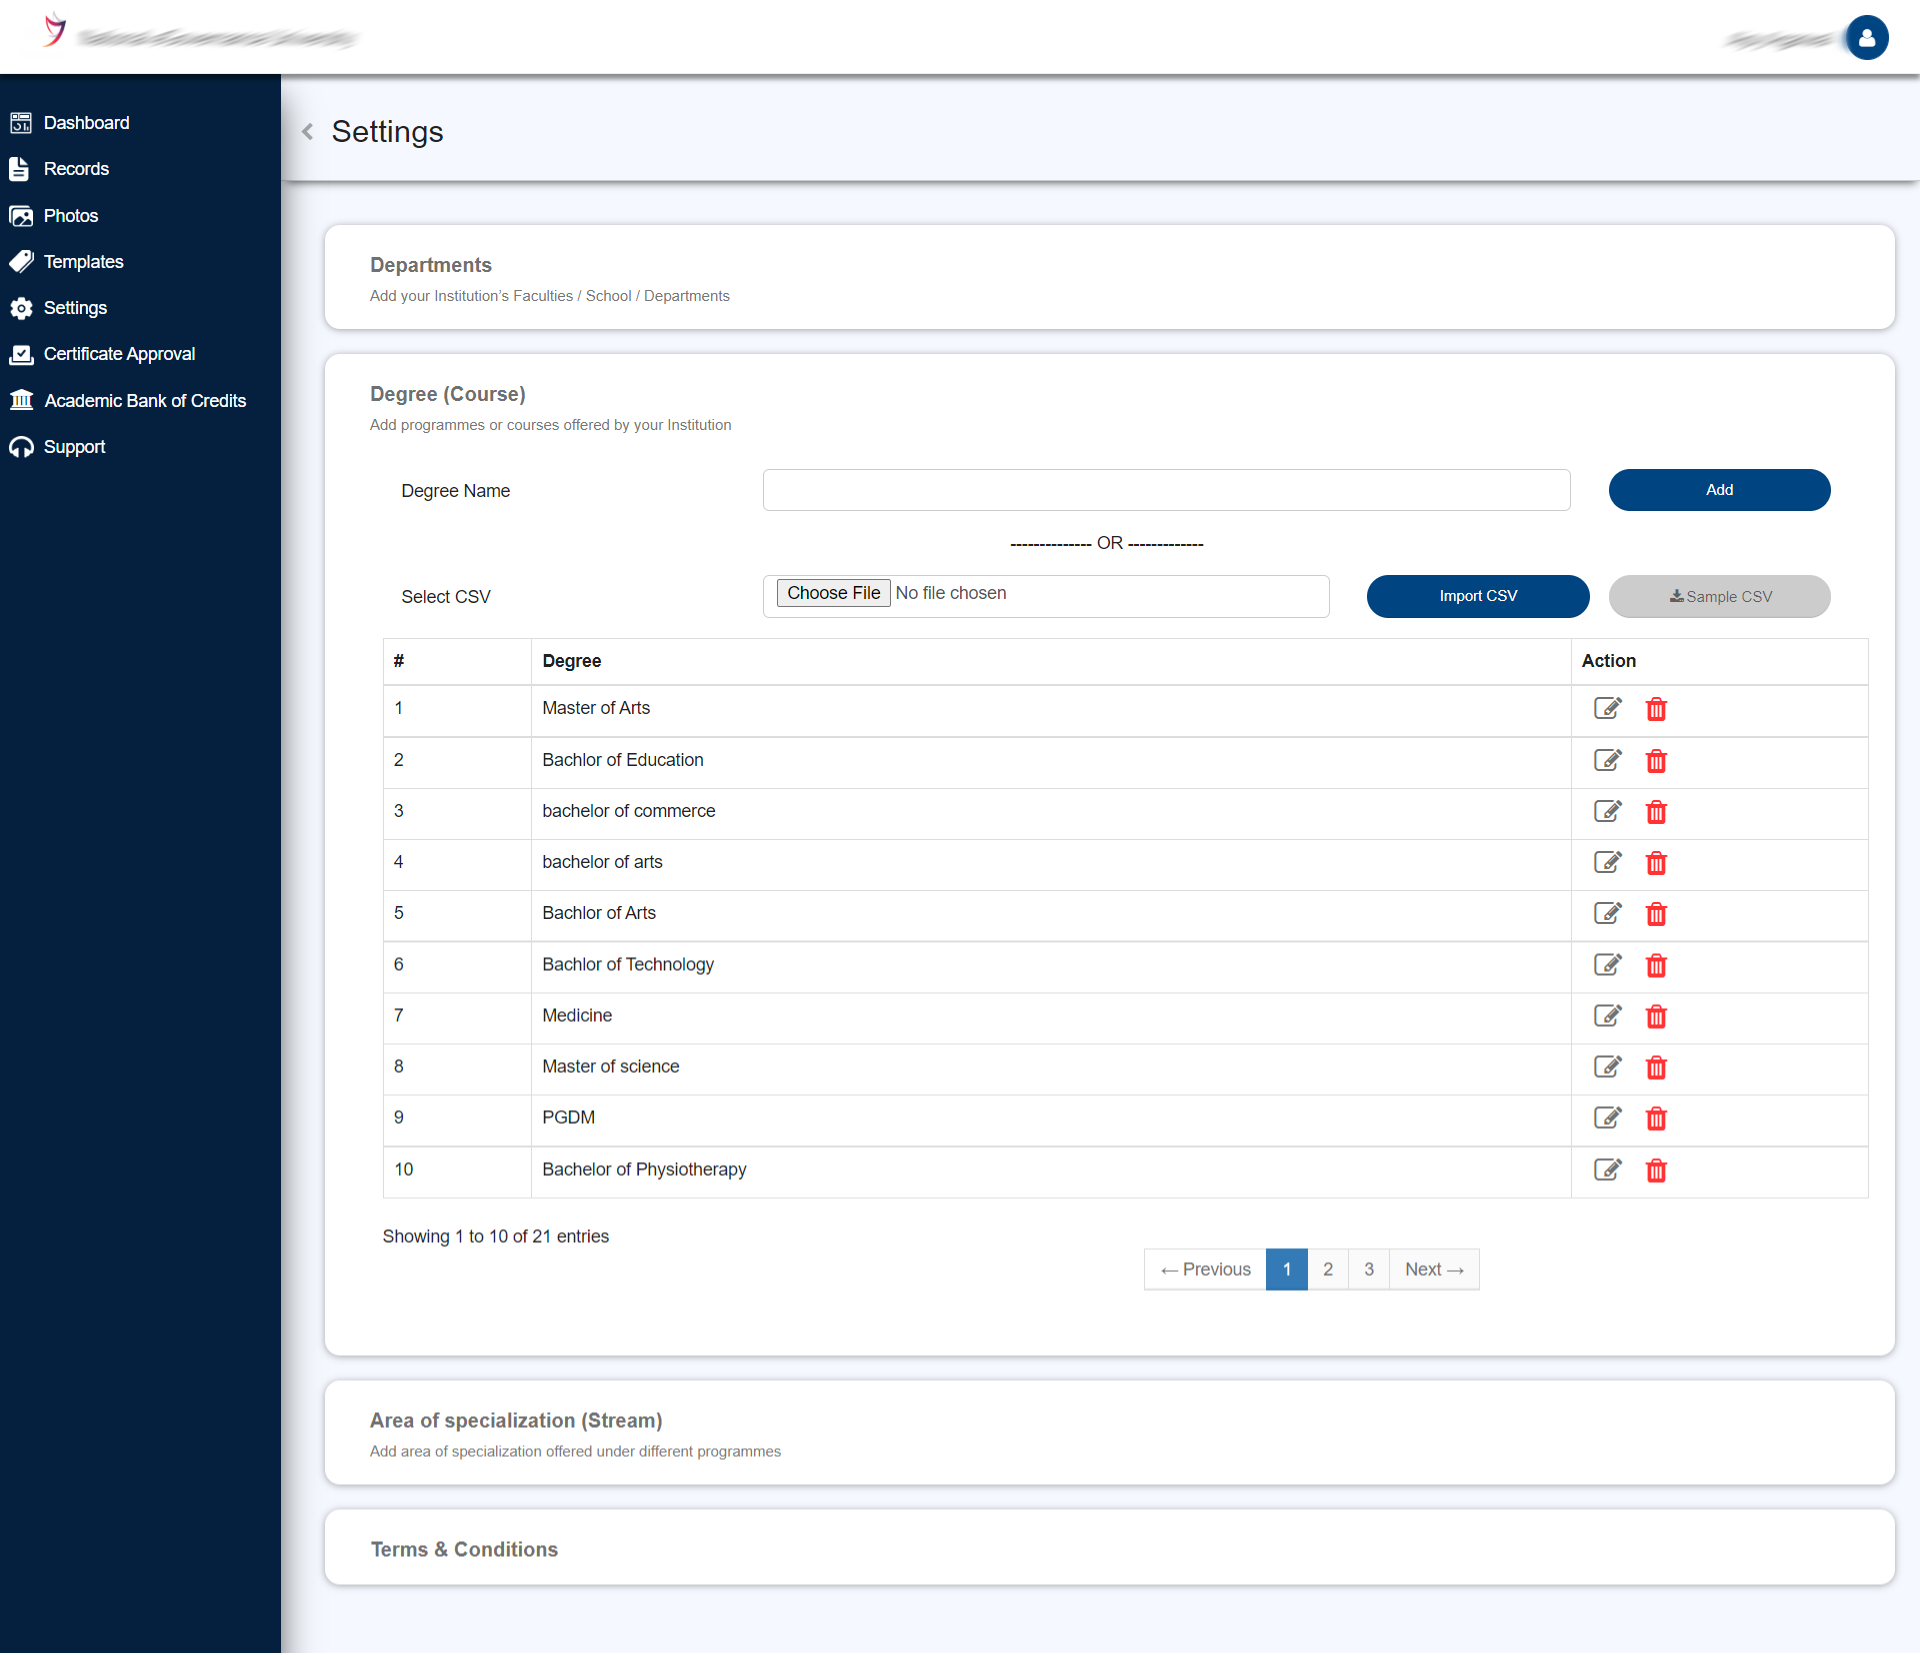
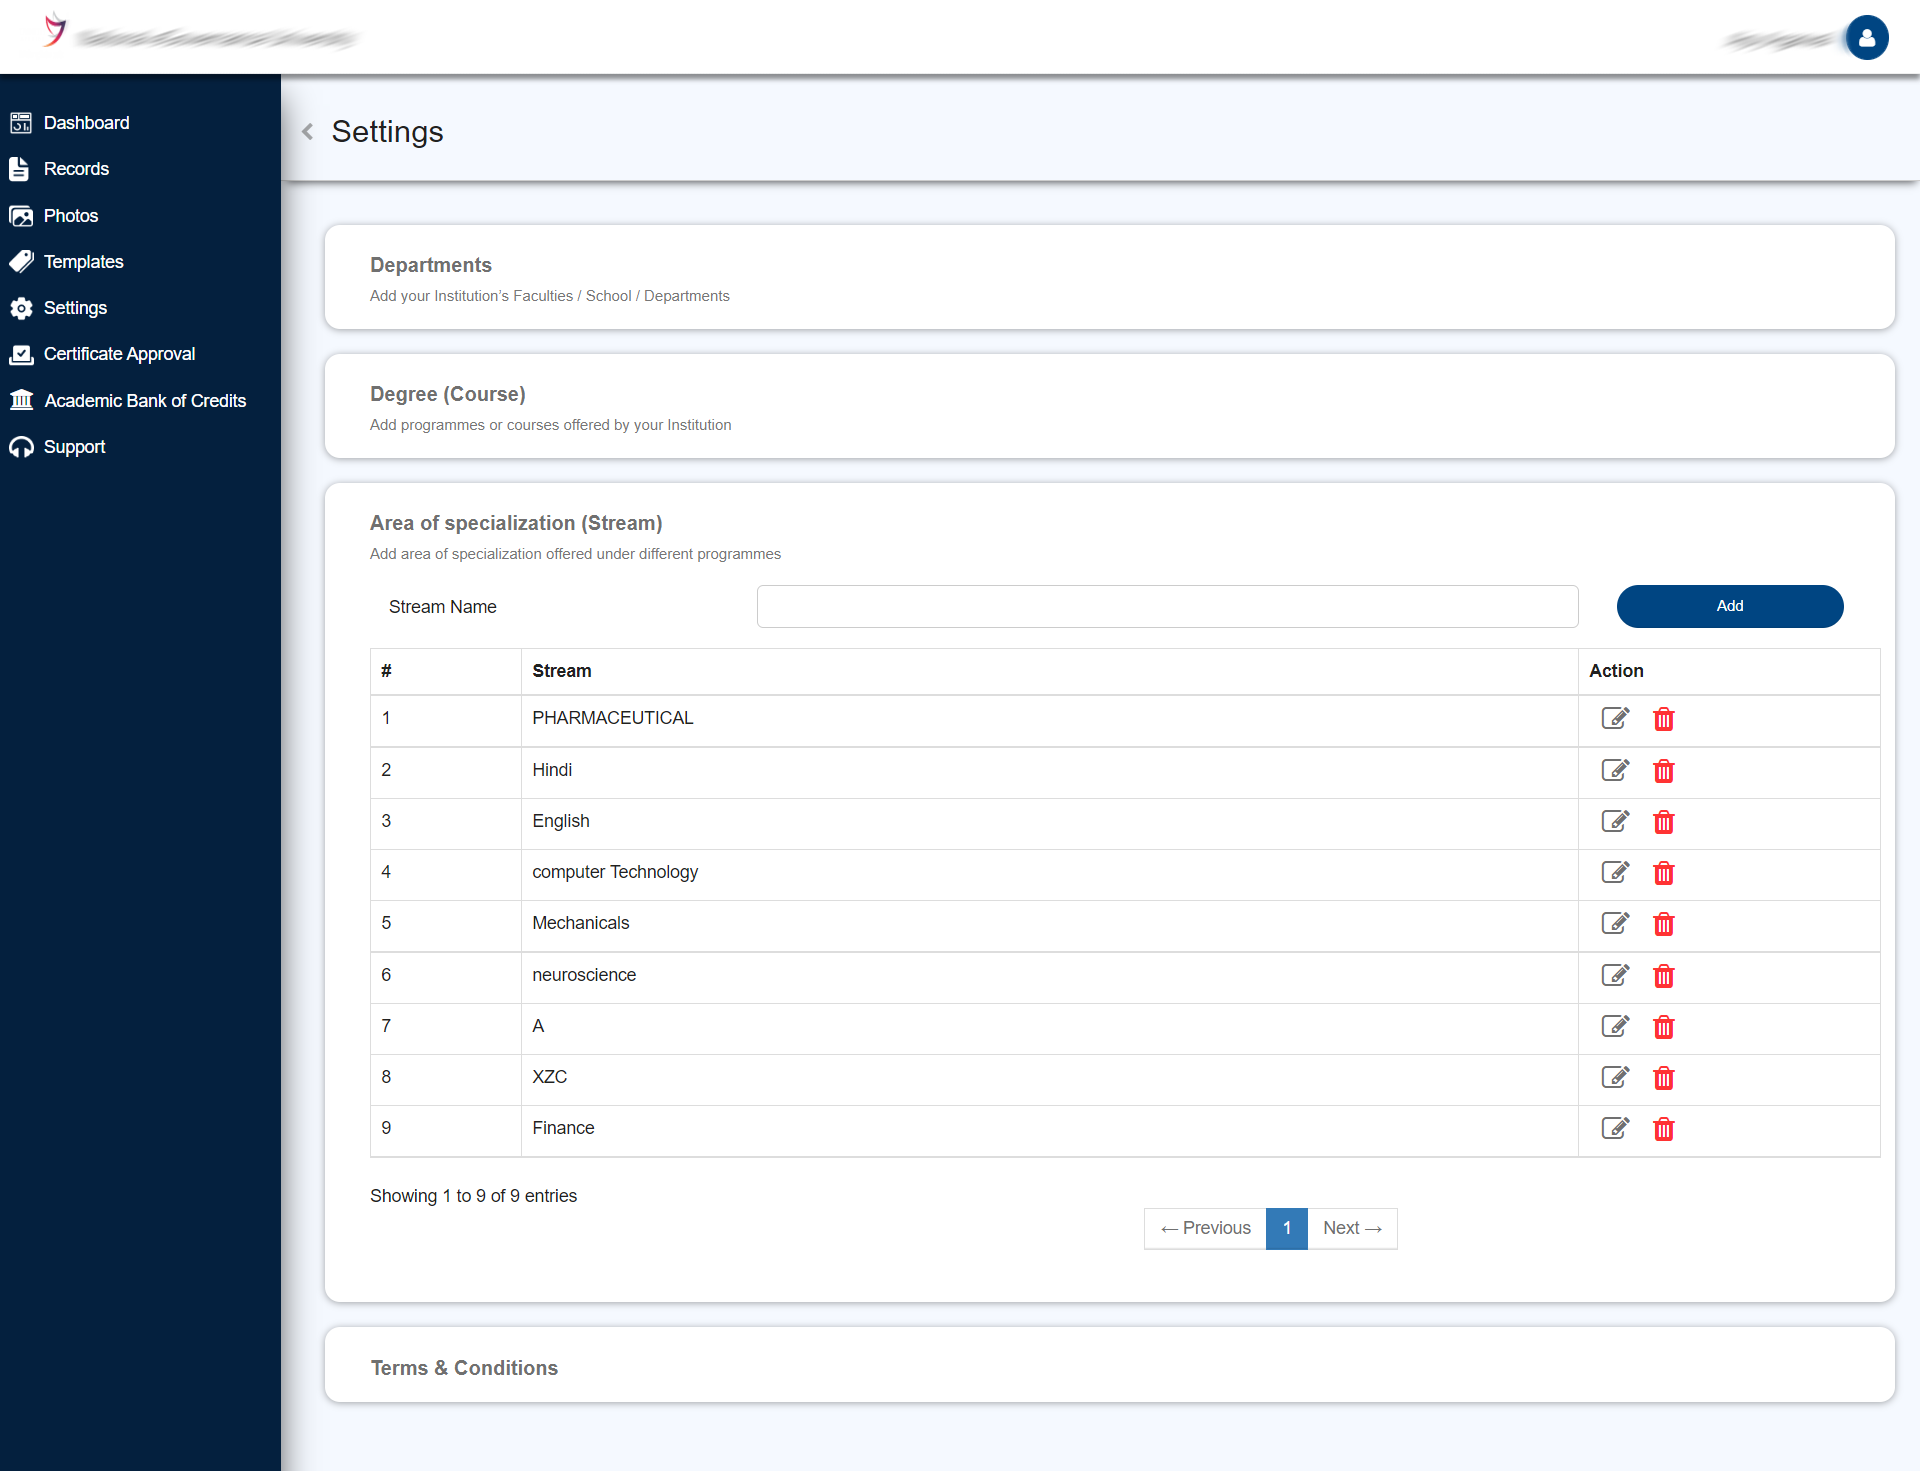
2.4. Settings
17
• General :
17
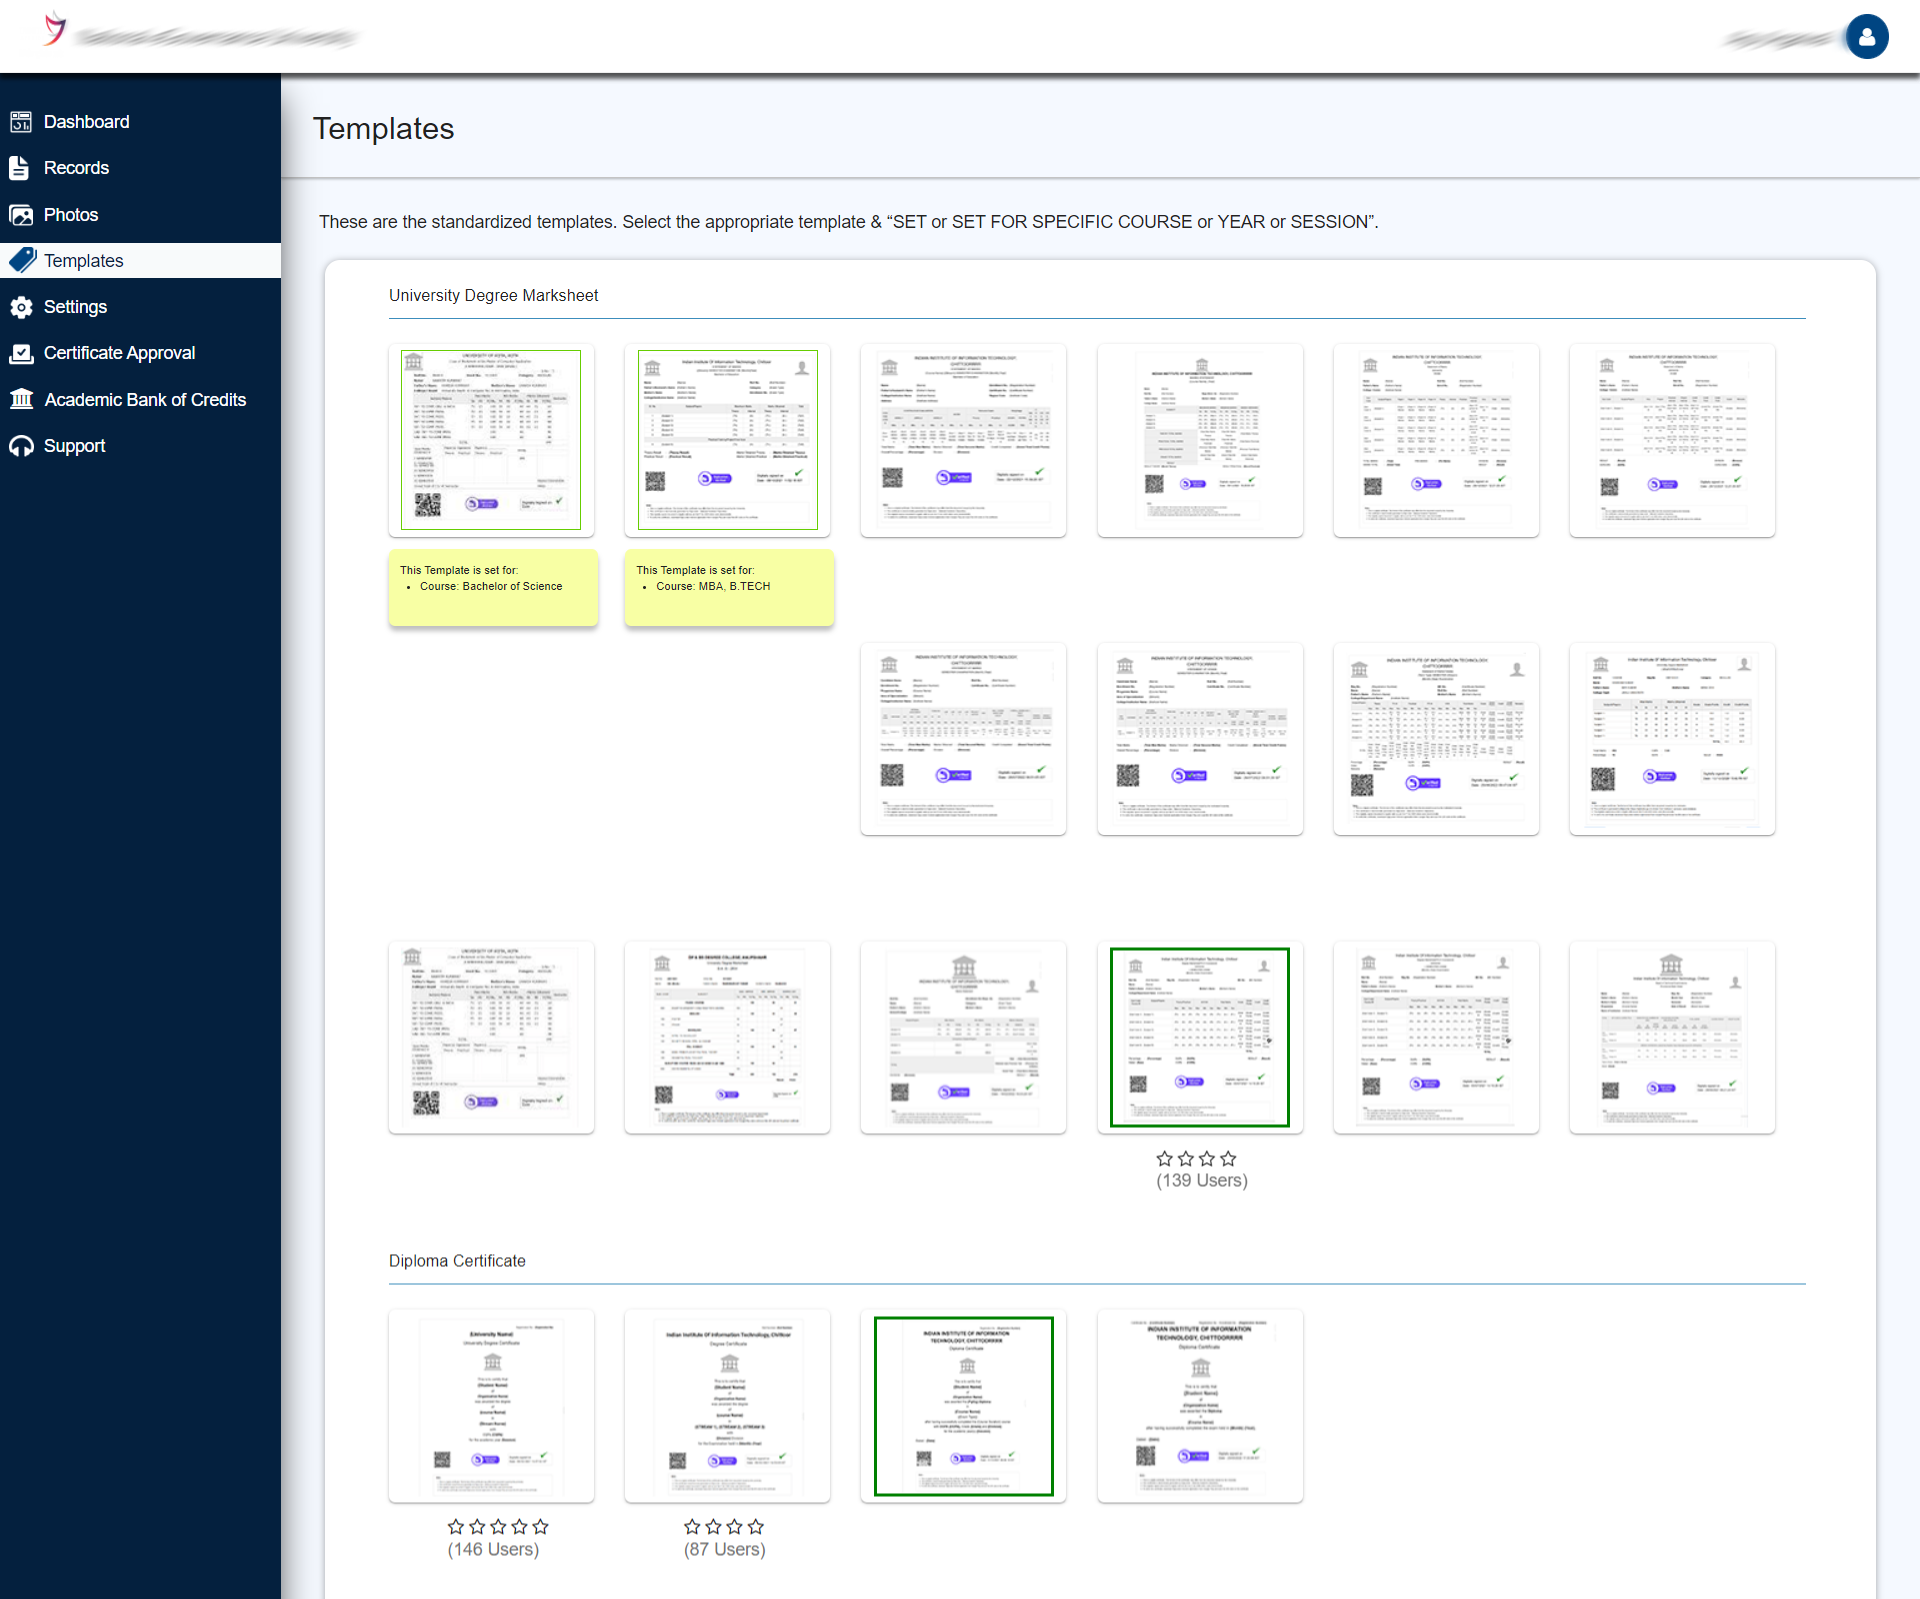
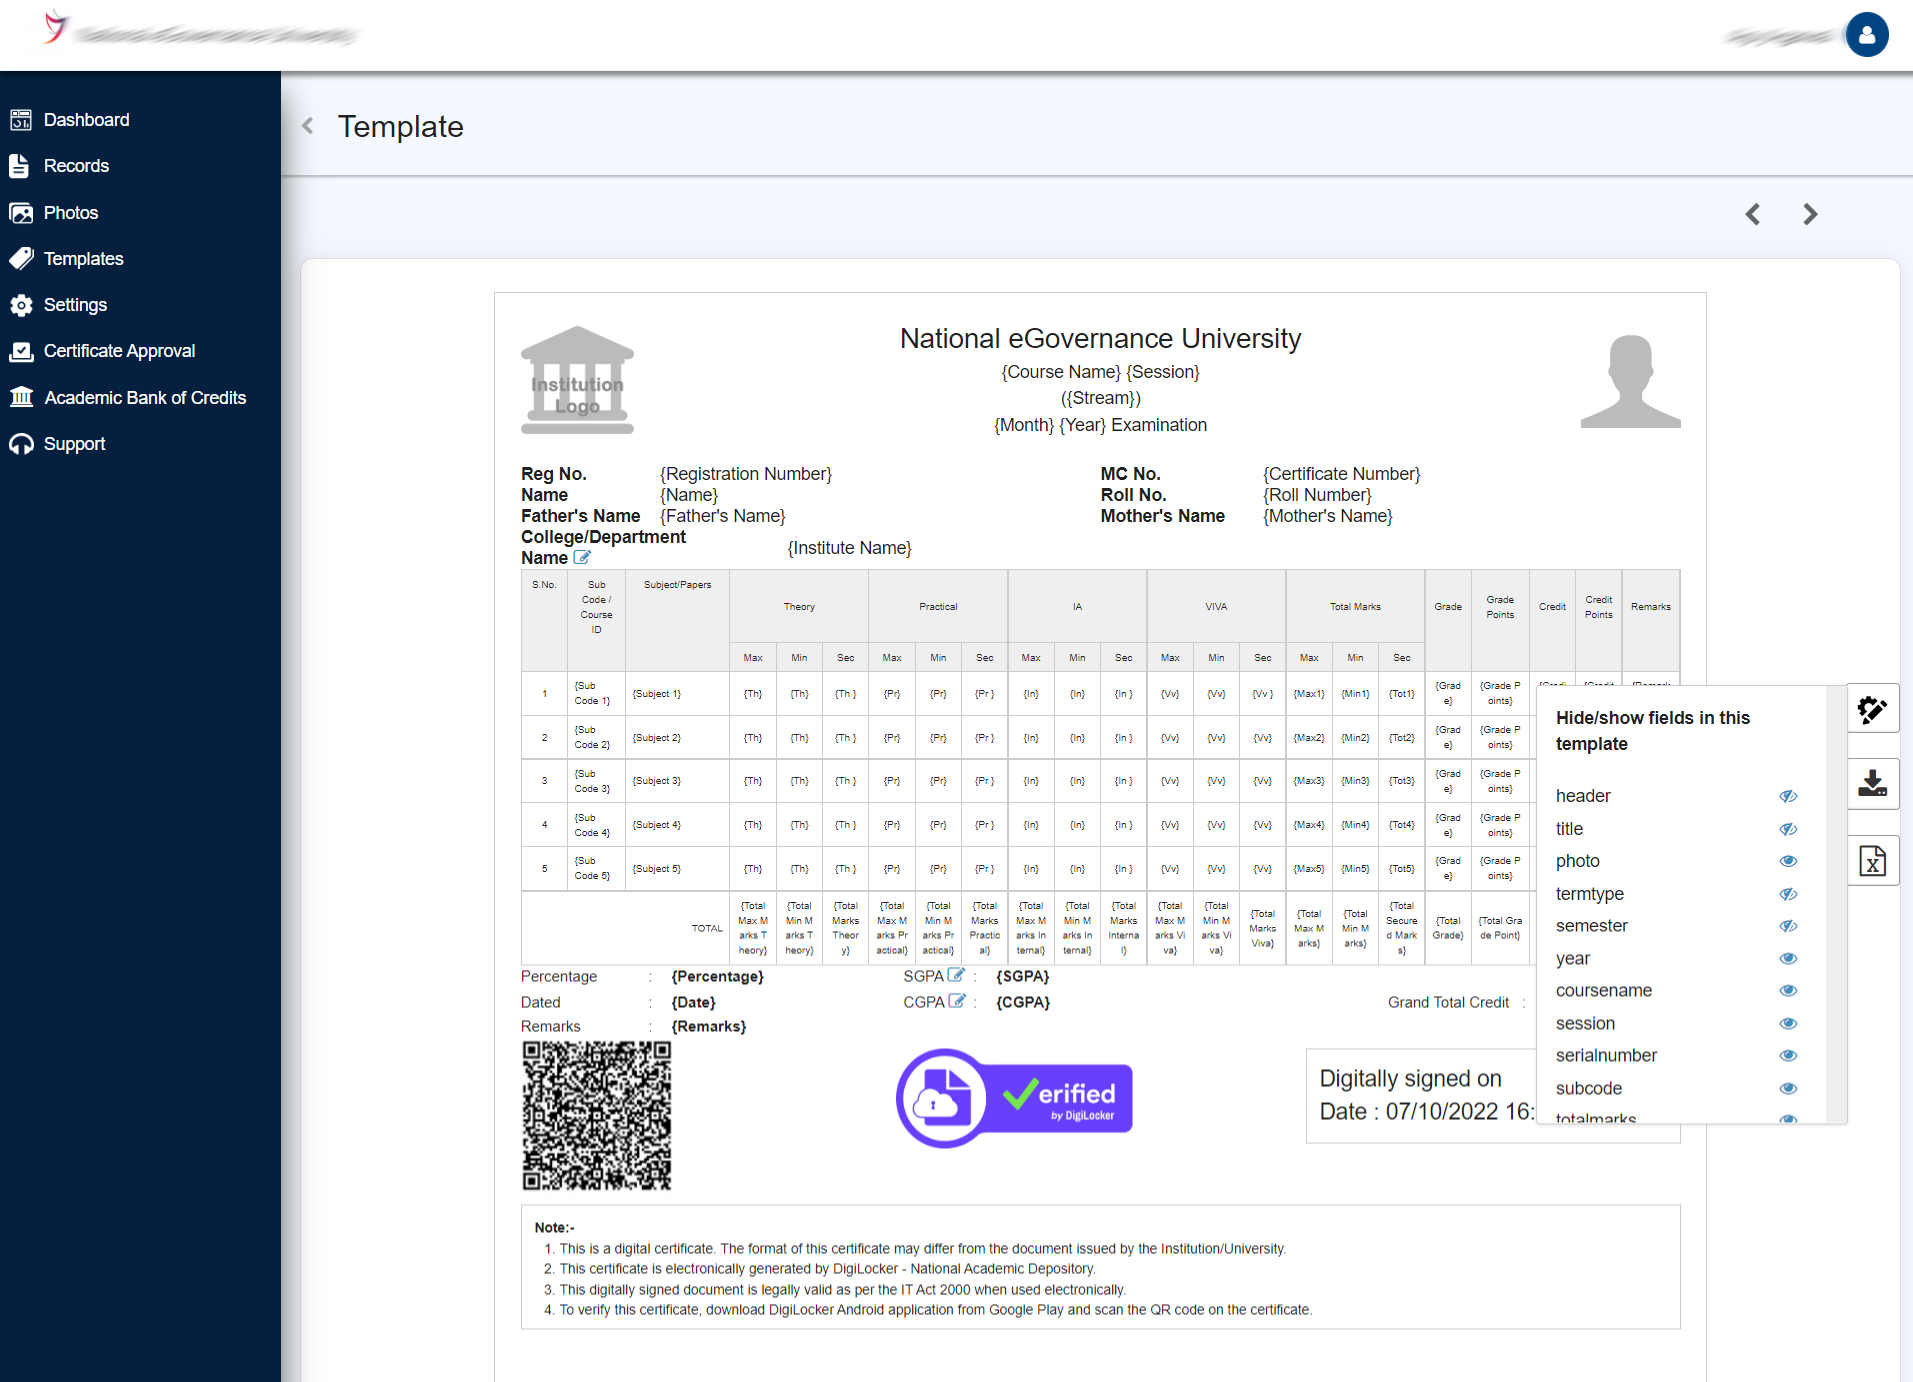
• Templates :
20
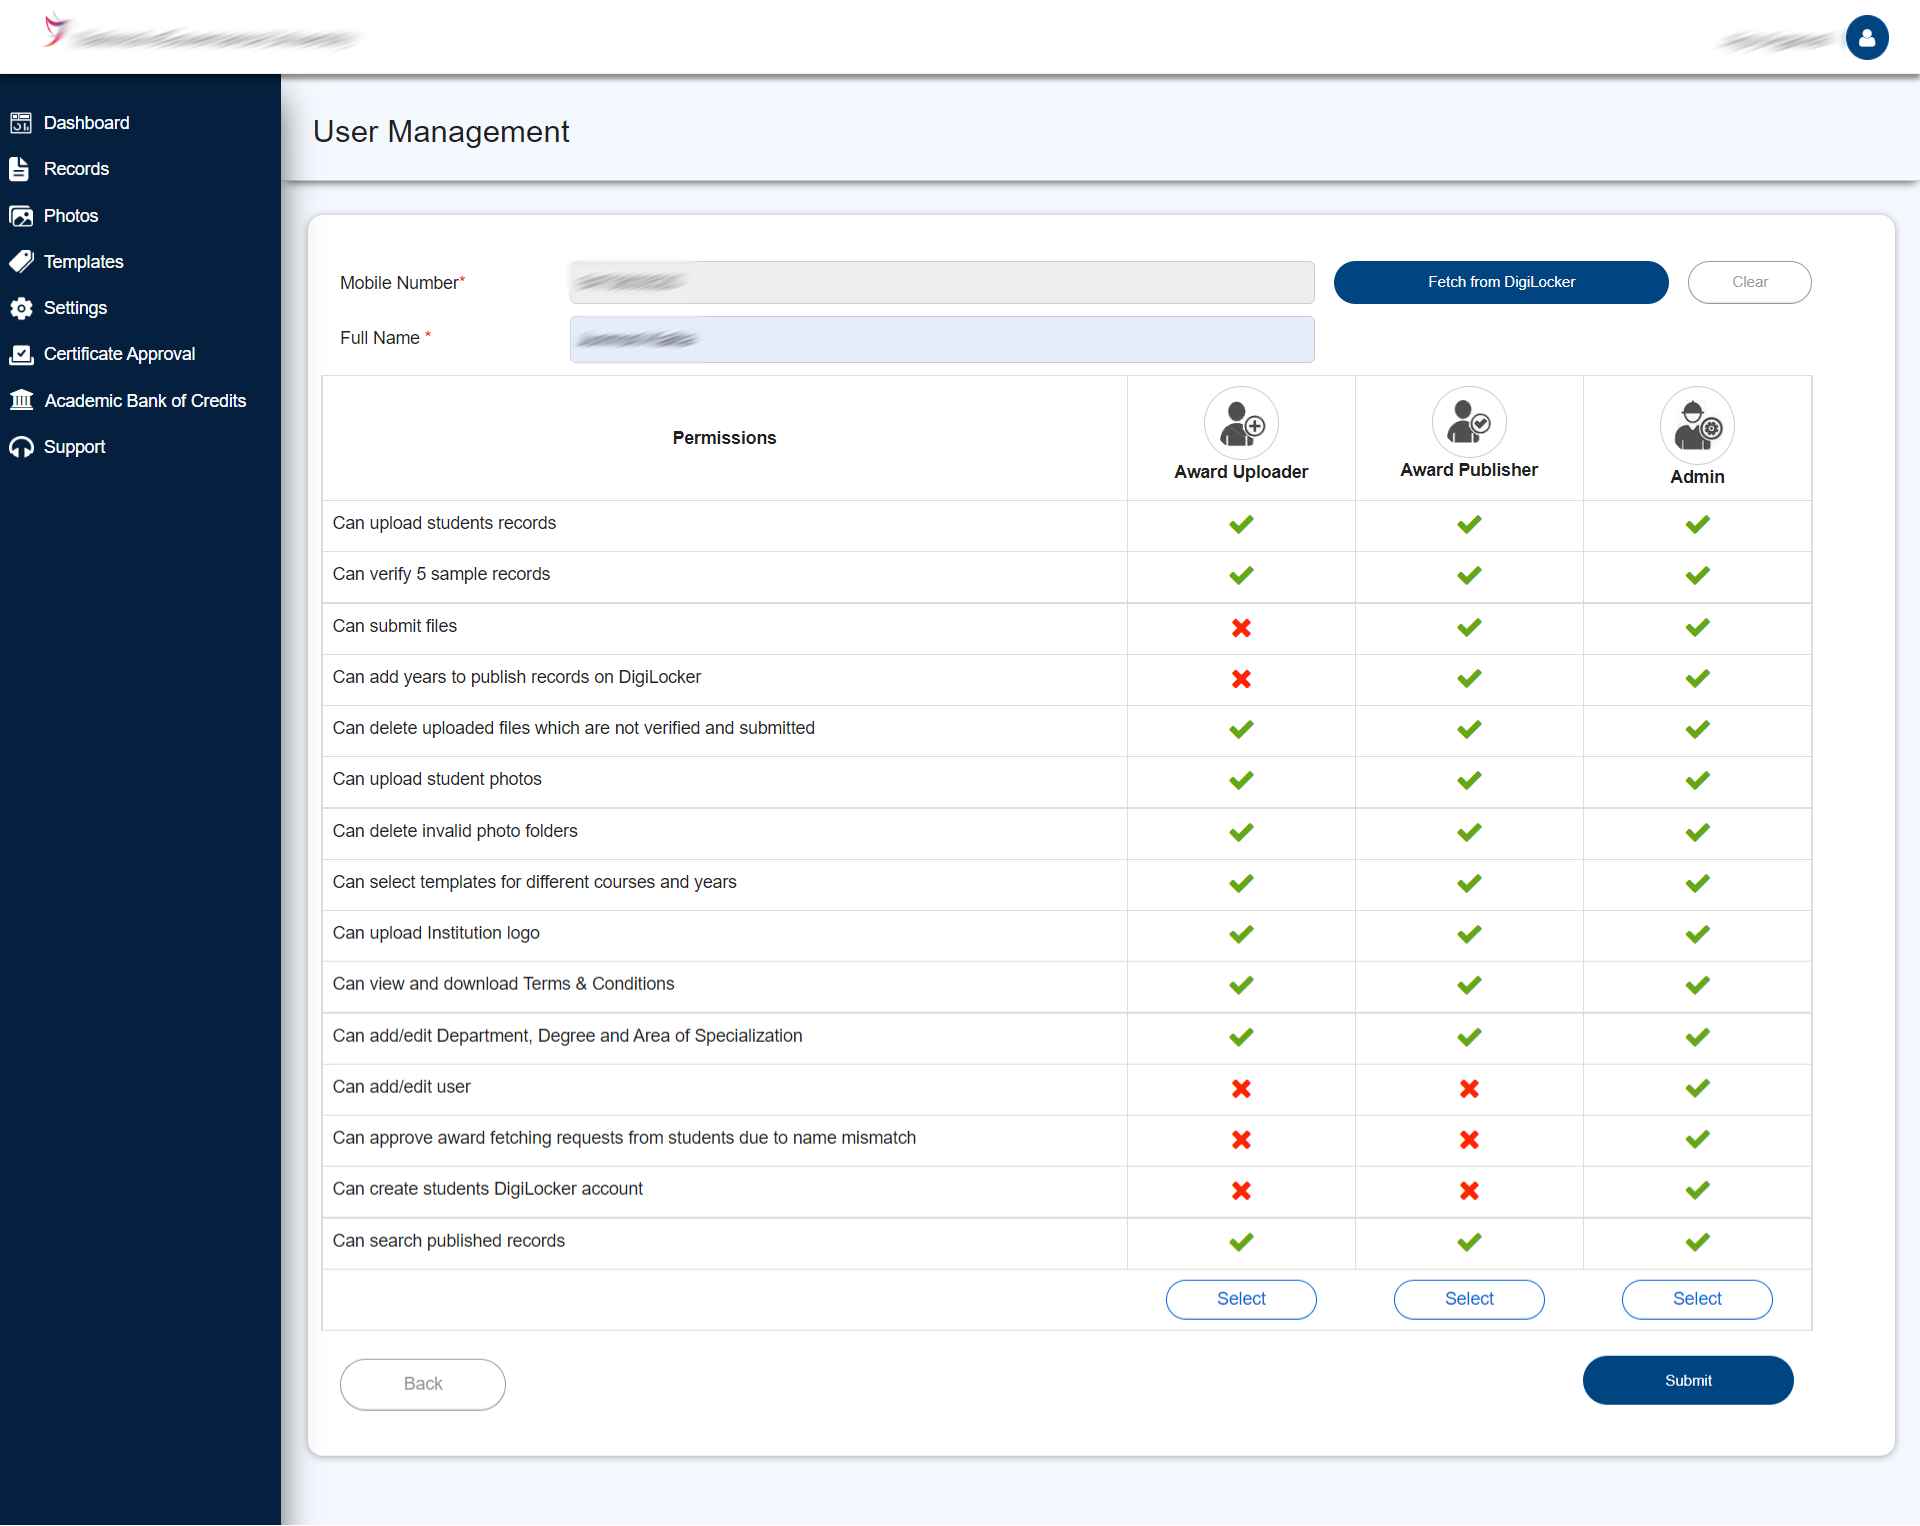
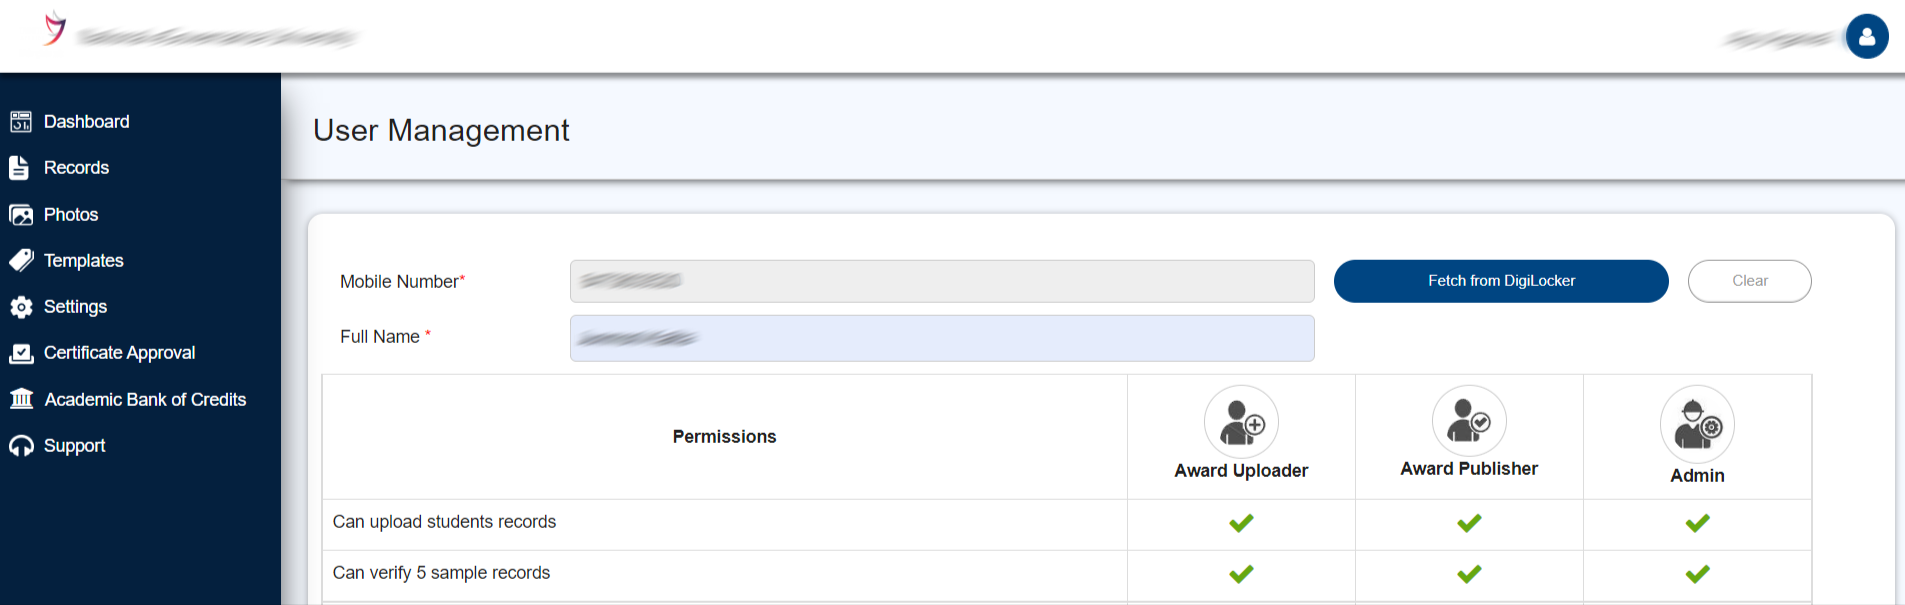
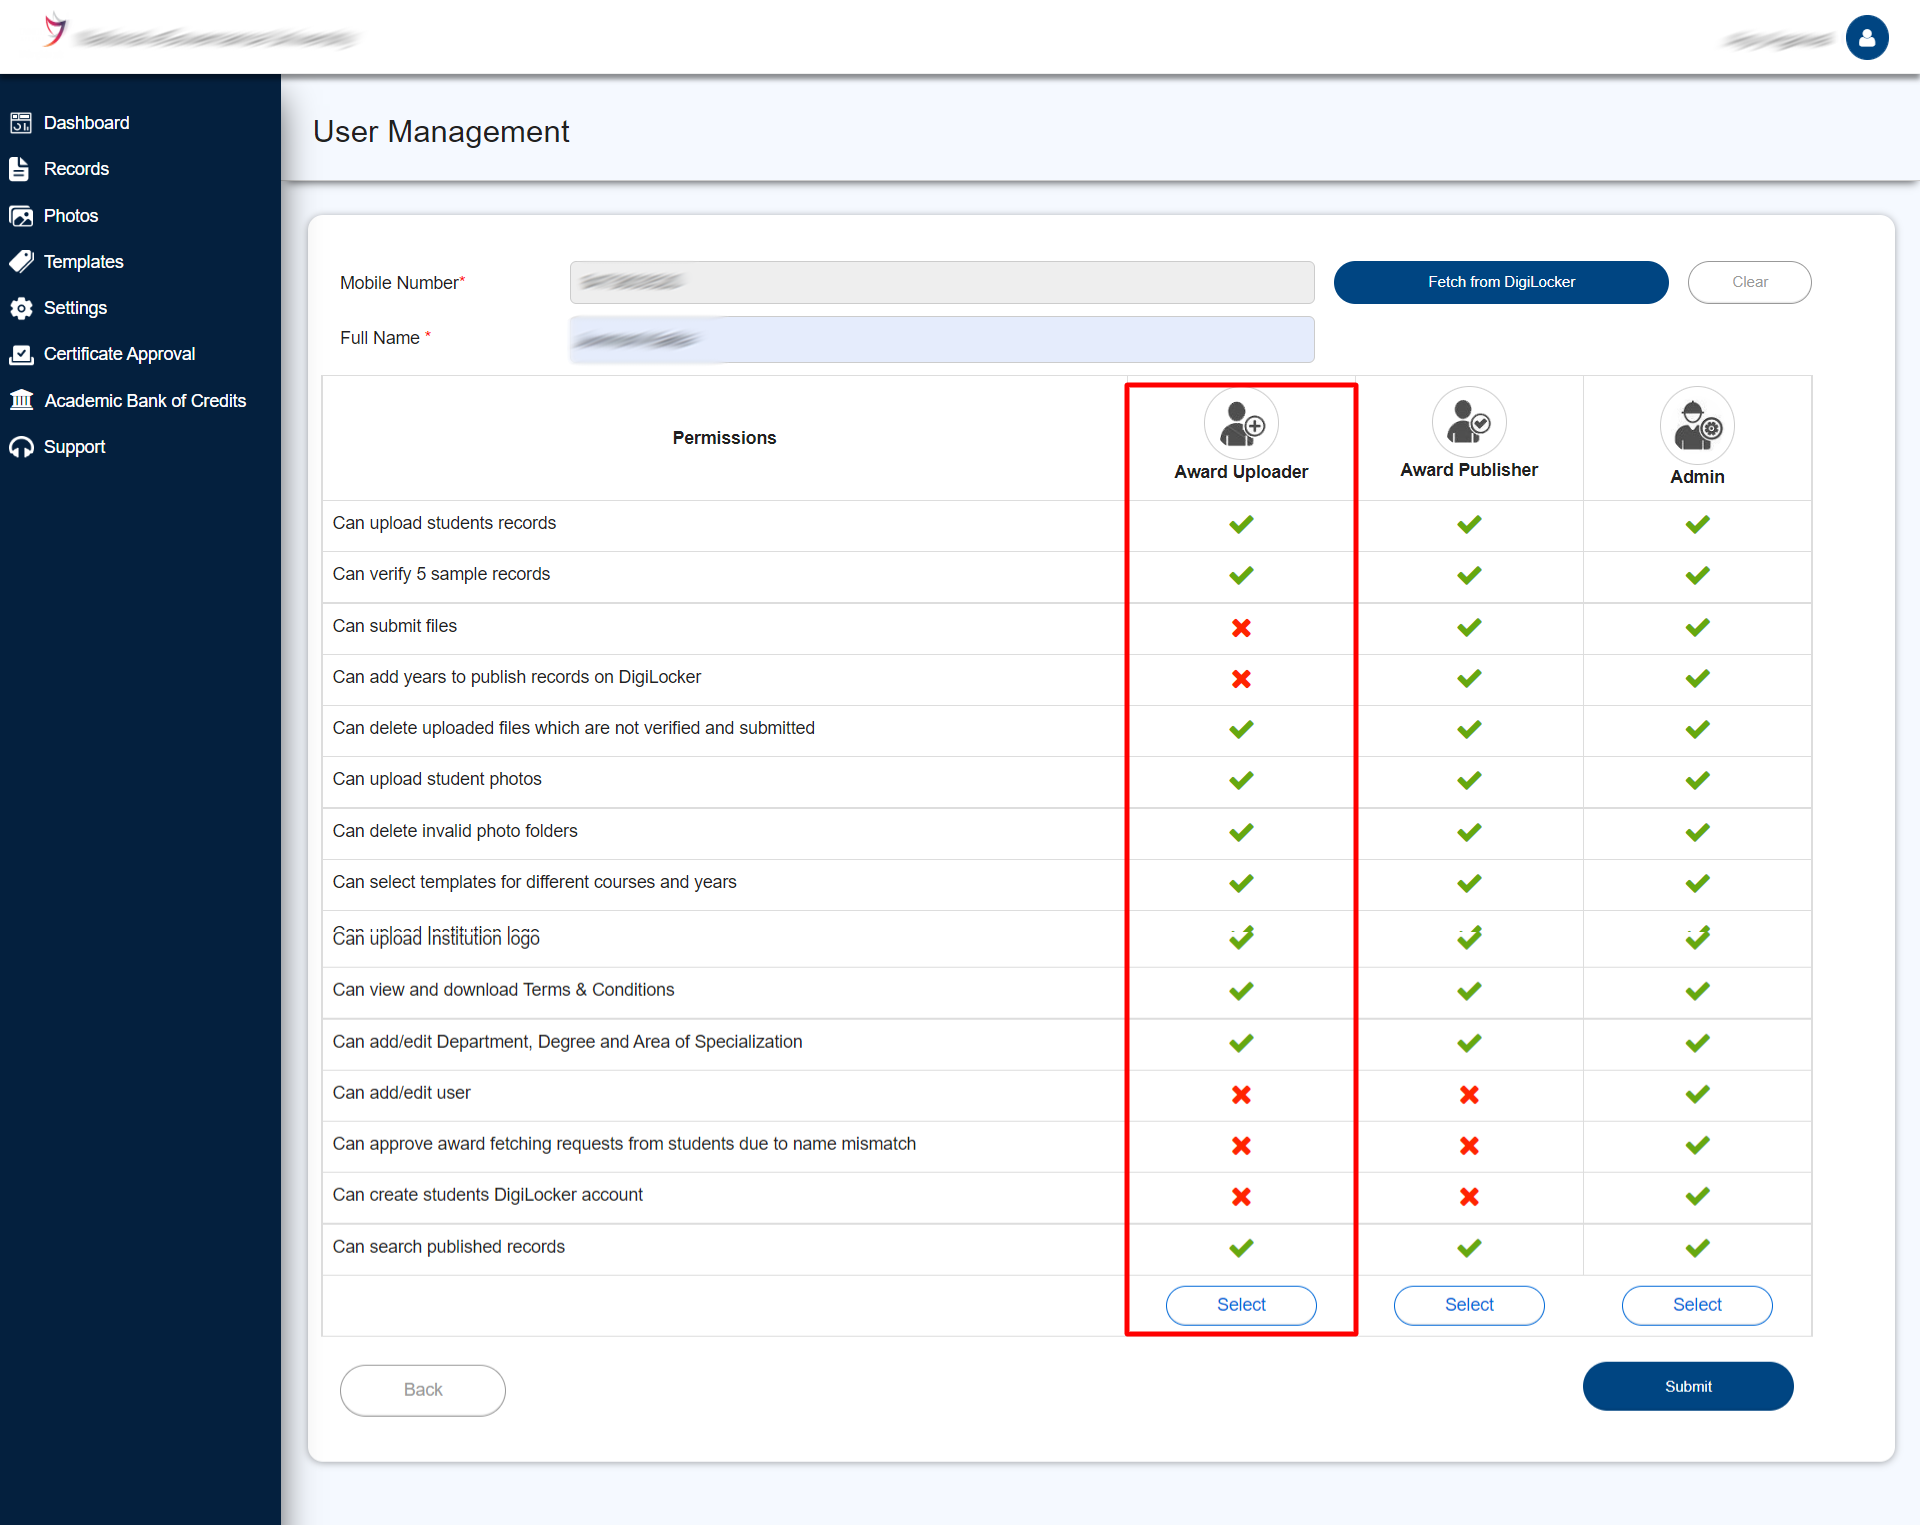
• User Management:
21
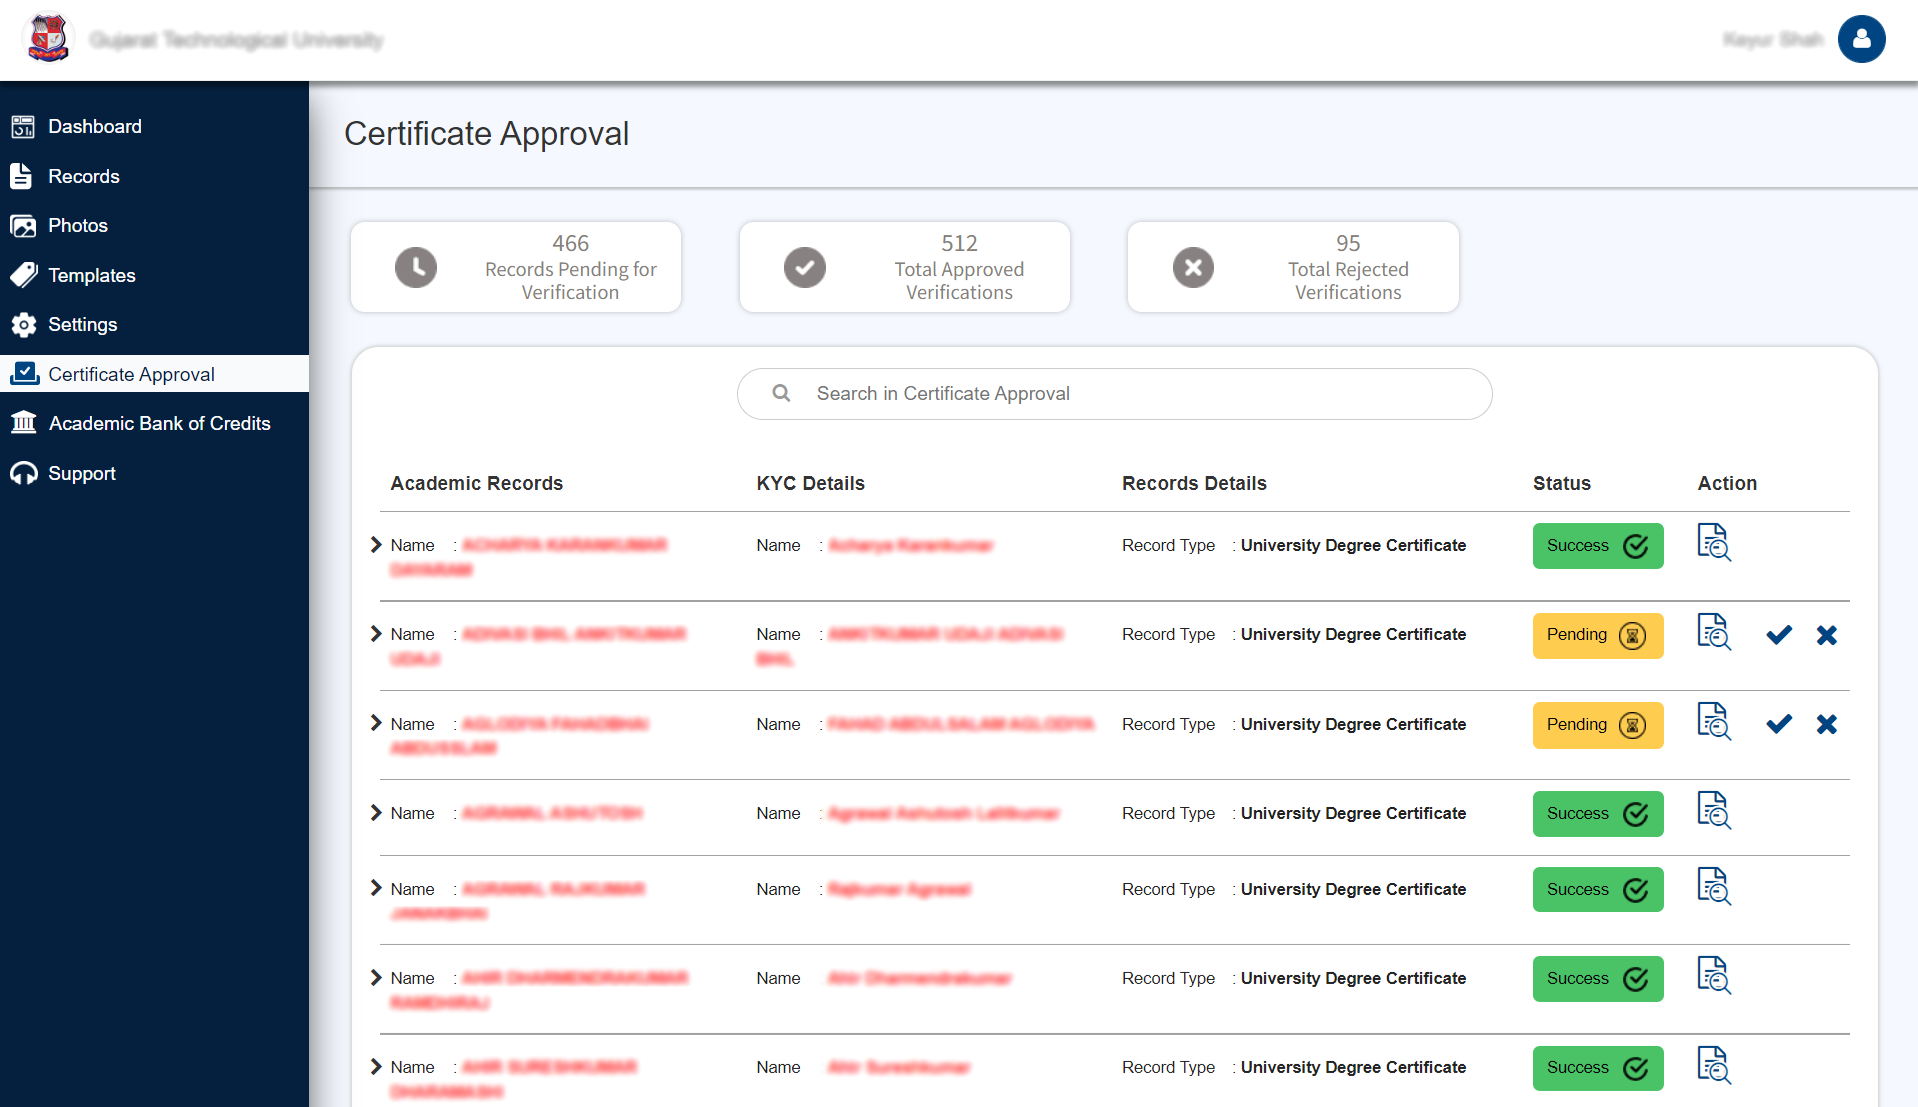
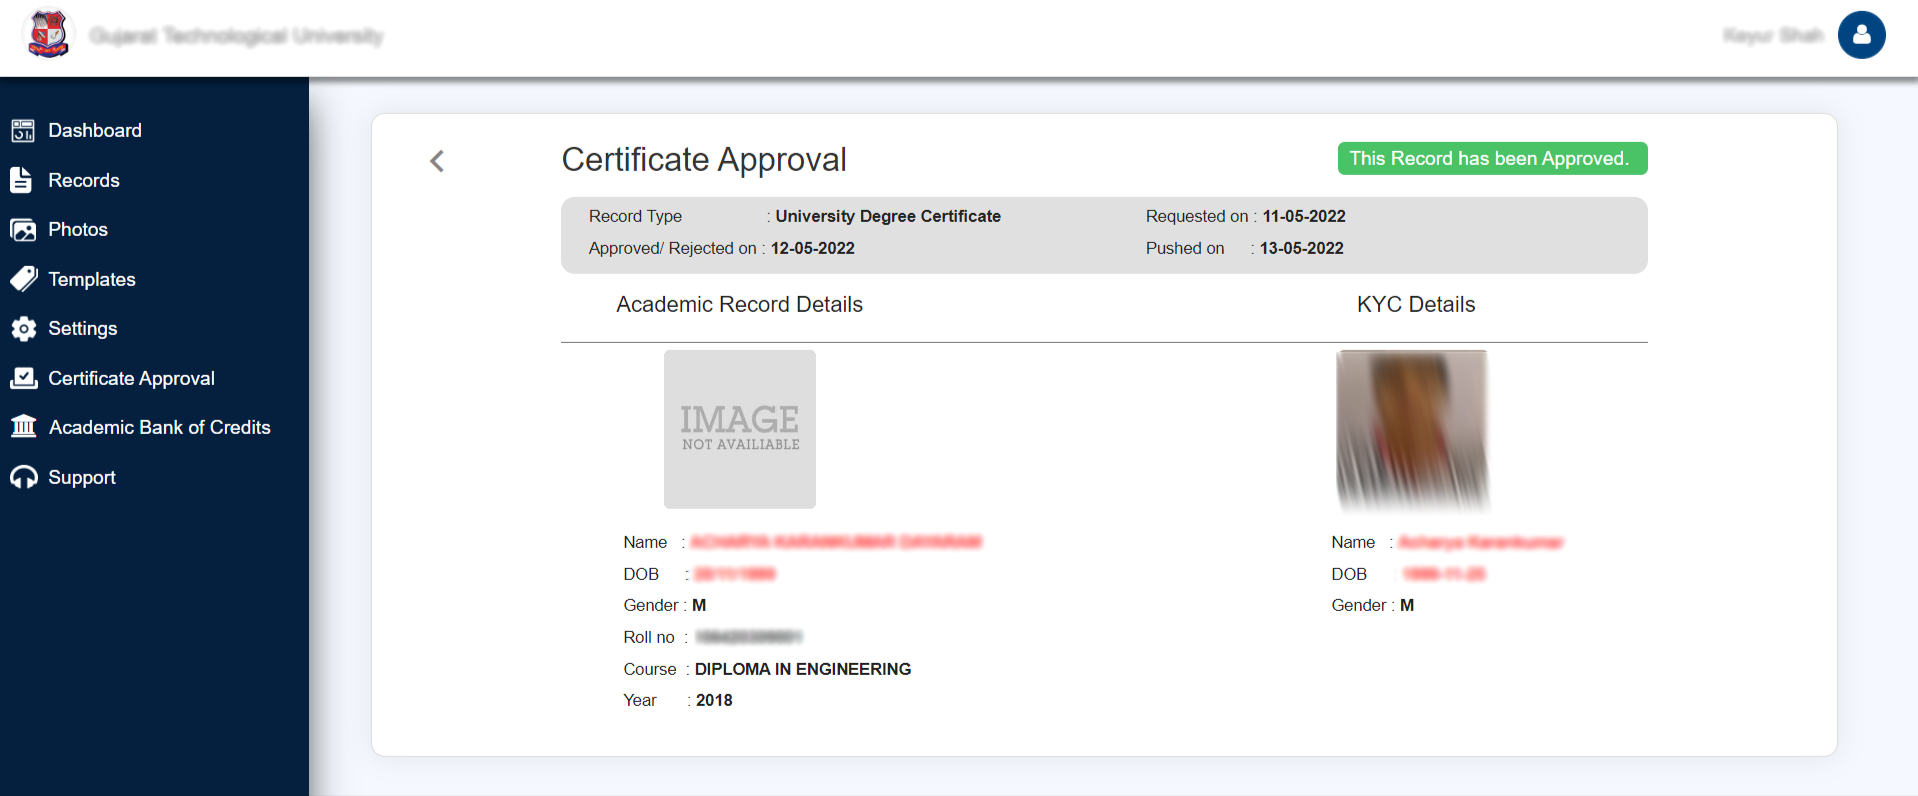
2.5. Certificate Approval
25
The idea of the National Academic Depository (NAD) emerged from the Government of
India as an attempt to create an online repository for students to access all their academic awards at ease. NAD seeks to provide a legitimate and user-friendly method for online submission, verification, and validation of academic awards granted by various educational institutions. It would significantly, verification, and validation of academic awards granted by various educational institutions. It would signficantly minimize frauduent activites such as certificate forgery and mark-sheet forgery by allowing online verifications of the same.
The DigiLocker NAD platform is a 24X7 online storehouse for all academic awards. such as certificates, deplomas, degress, mark sheets, and so on, that have been officially digitized and registered by academic institutions/boards/eligibility assessment bodies. It enables simple access to and retrieval of an academic award and confirms and assures its validity and secure preservation.
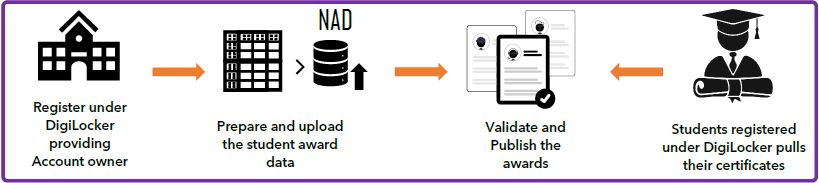
The National Academic Depositiory (NAD) is a digital education portal that allows academic institutions to upload award data and students to view their academic awards. Academic institutions to upload award data and students to view their academic awards. Academic institutions submit student data to the site, and students, after registration, can pull their certificates and documents to their individual DigiLocker account.
The NAD platform provides the establishment of a variet of roles, including creating student and academic accounts, the preparation of student data according to a standard certificate template, and the publication of year/cours-specific data. The primary objective of this guide is to give step-by-step instructions to accademic institutions and educate them on the registration proces, data preparation, and all of the features of the NAD application until the publication of the awards.
The Academic Institutions will have access to the following functionalities in the NAD application:
• Academic Institutions can register can by logging in at www.nad.digilocker.gov.in
Click on Academia
• Click on "Login with DigiLocker MeriPehchaan" → Enter valid mobile number → An OTP is sent at the phone number via SMS → Enter the OTP and click on "Continue" button → Enter Security PIN set created during Sign Up and click "Submit" Button
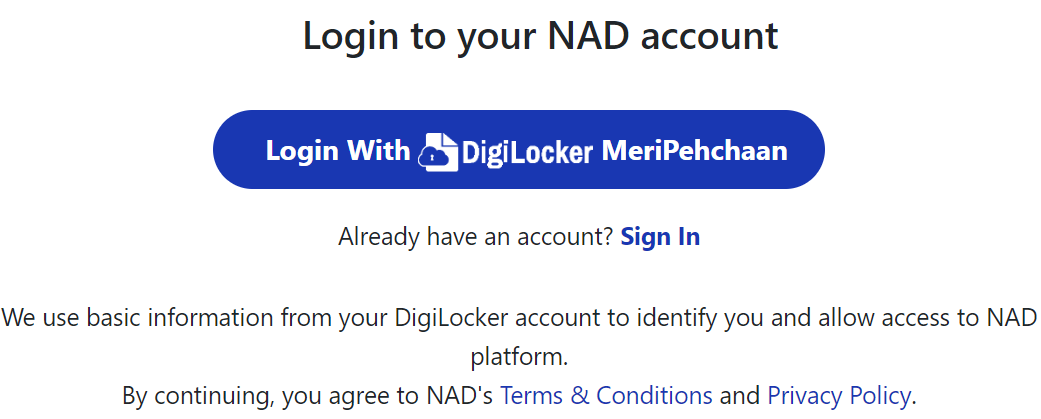

• The creation of a DigiLocker account is mandatory to operate NAD
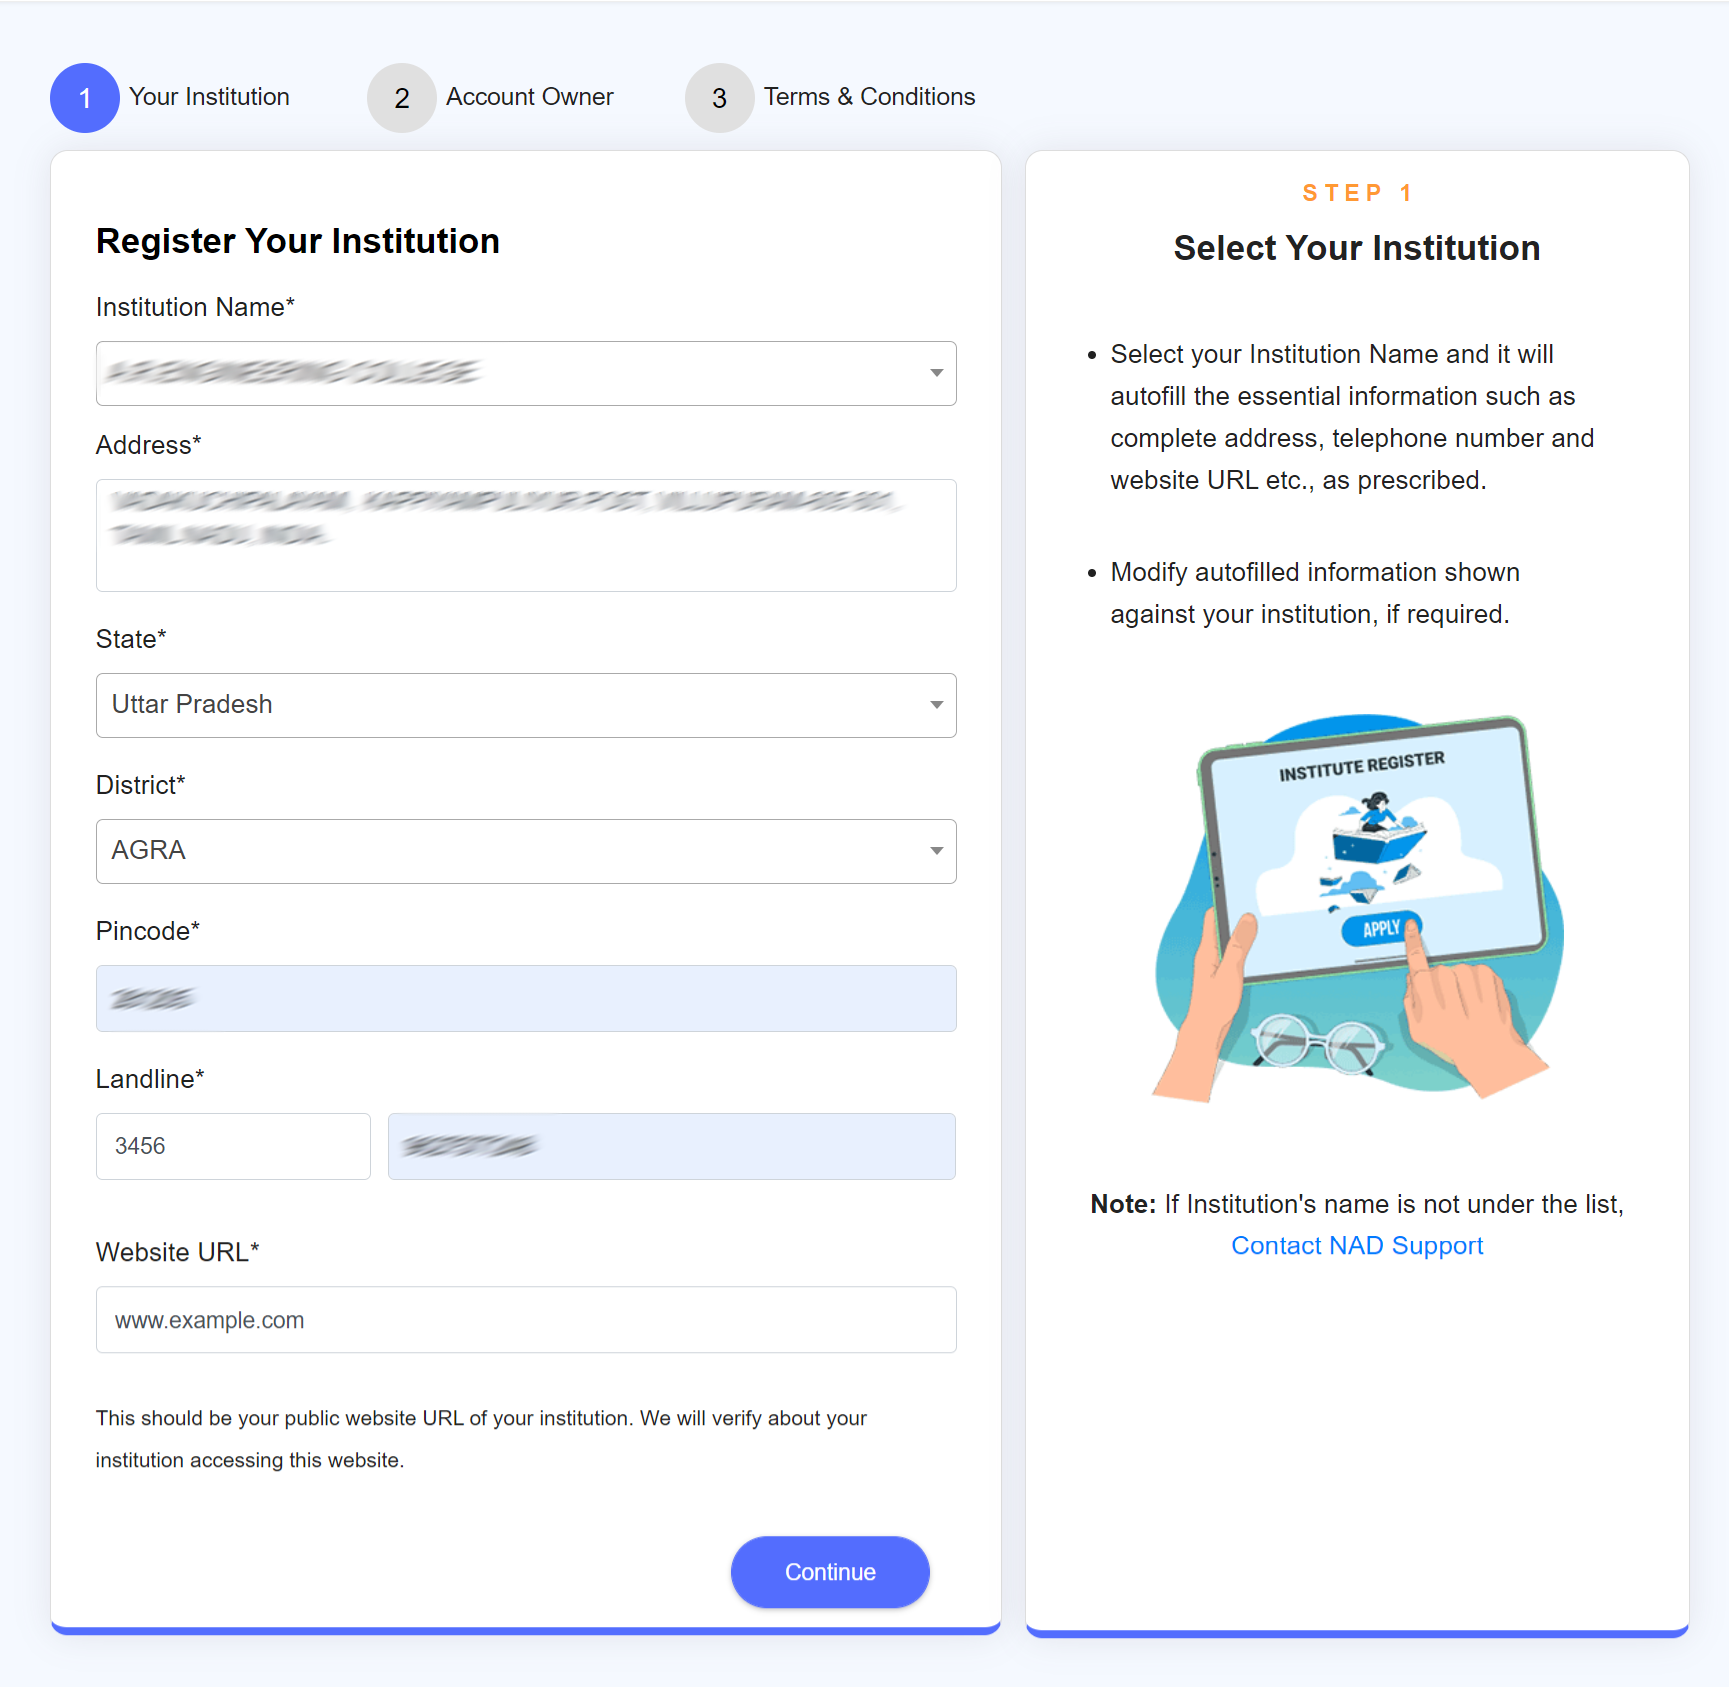
• Select you Institution from dropdownlist Address and other details will be autopopulated
• If your Institution is not under teh list contact NAD support
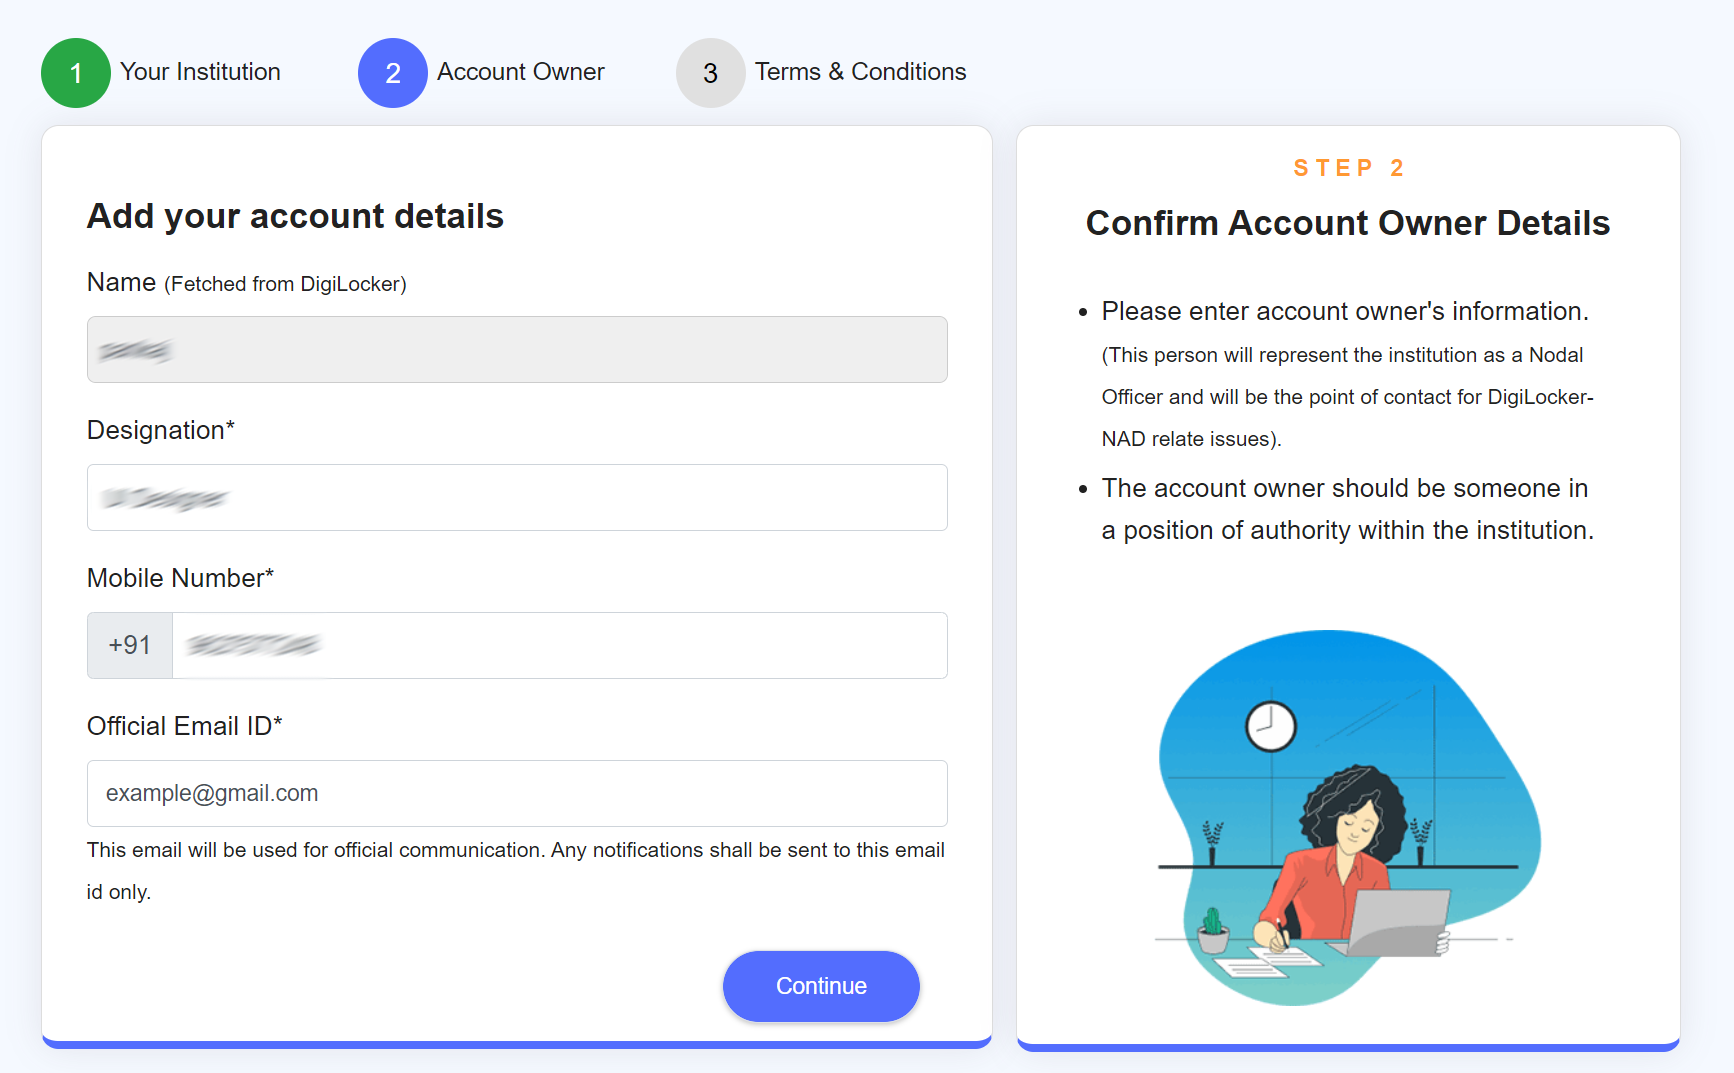
• Account Owner* name will be auto-populated from DigiLocker → Add Designation →Mobile number → Official Email ID
*Account Owner can be any authorized decision-making authority who shall be the point of contact for any NAD related matters
• Click on the “Continue” button → for redirection to the “Welcome page” window
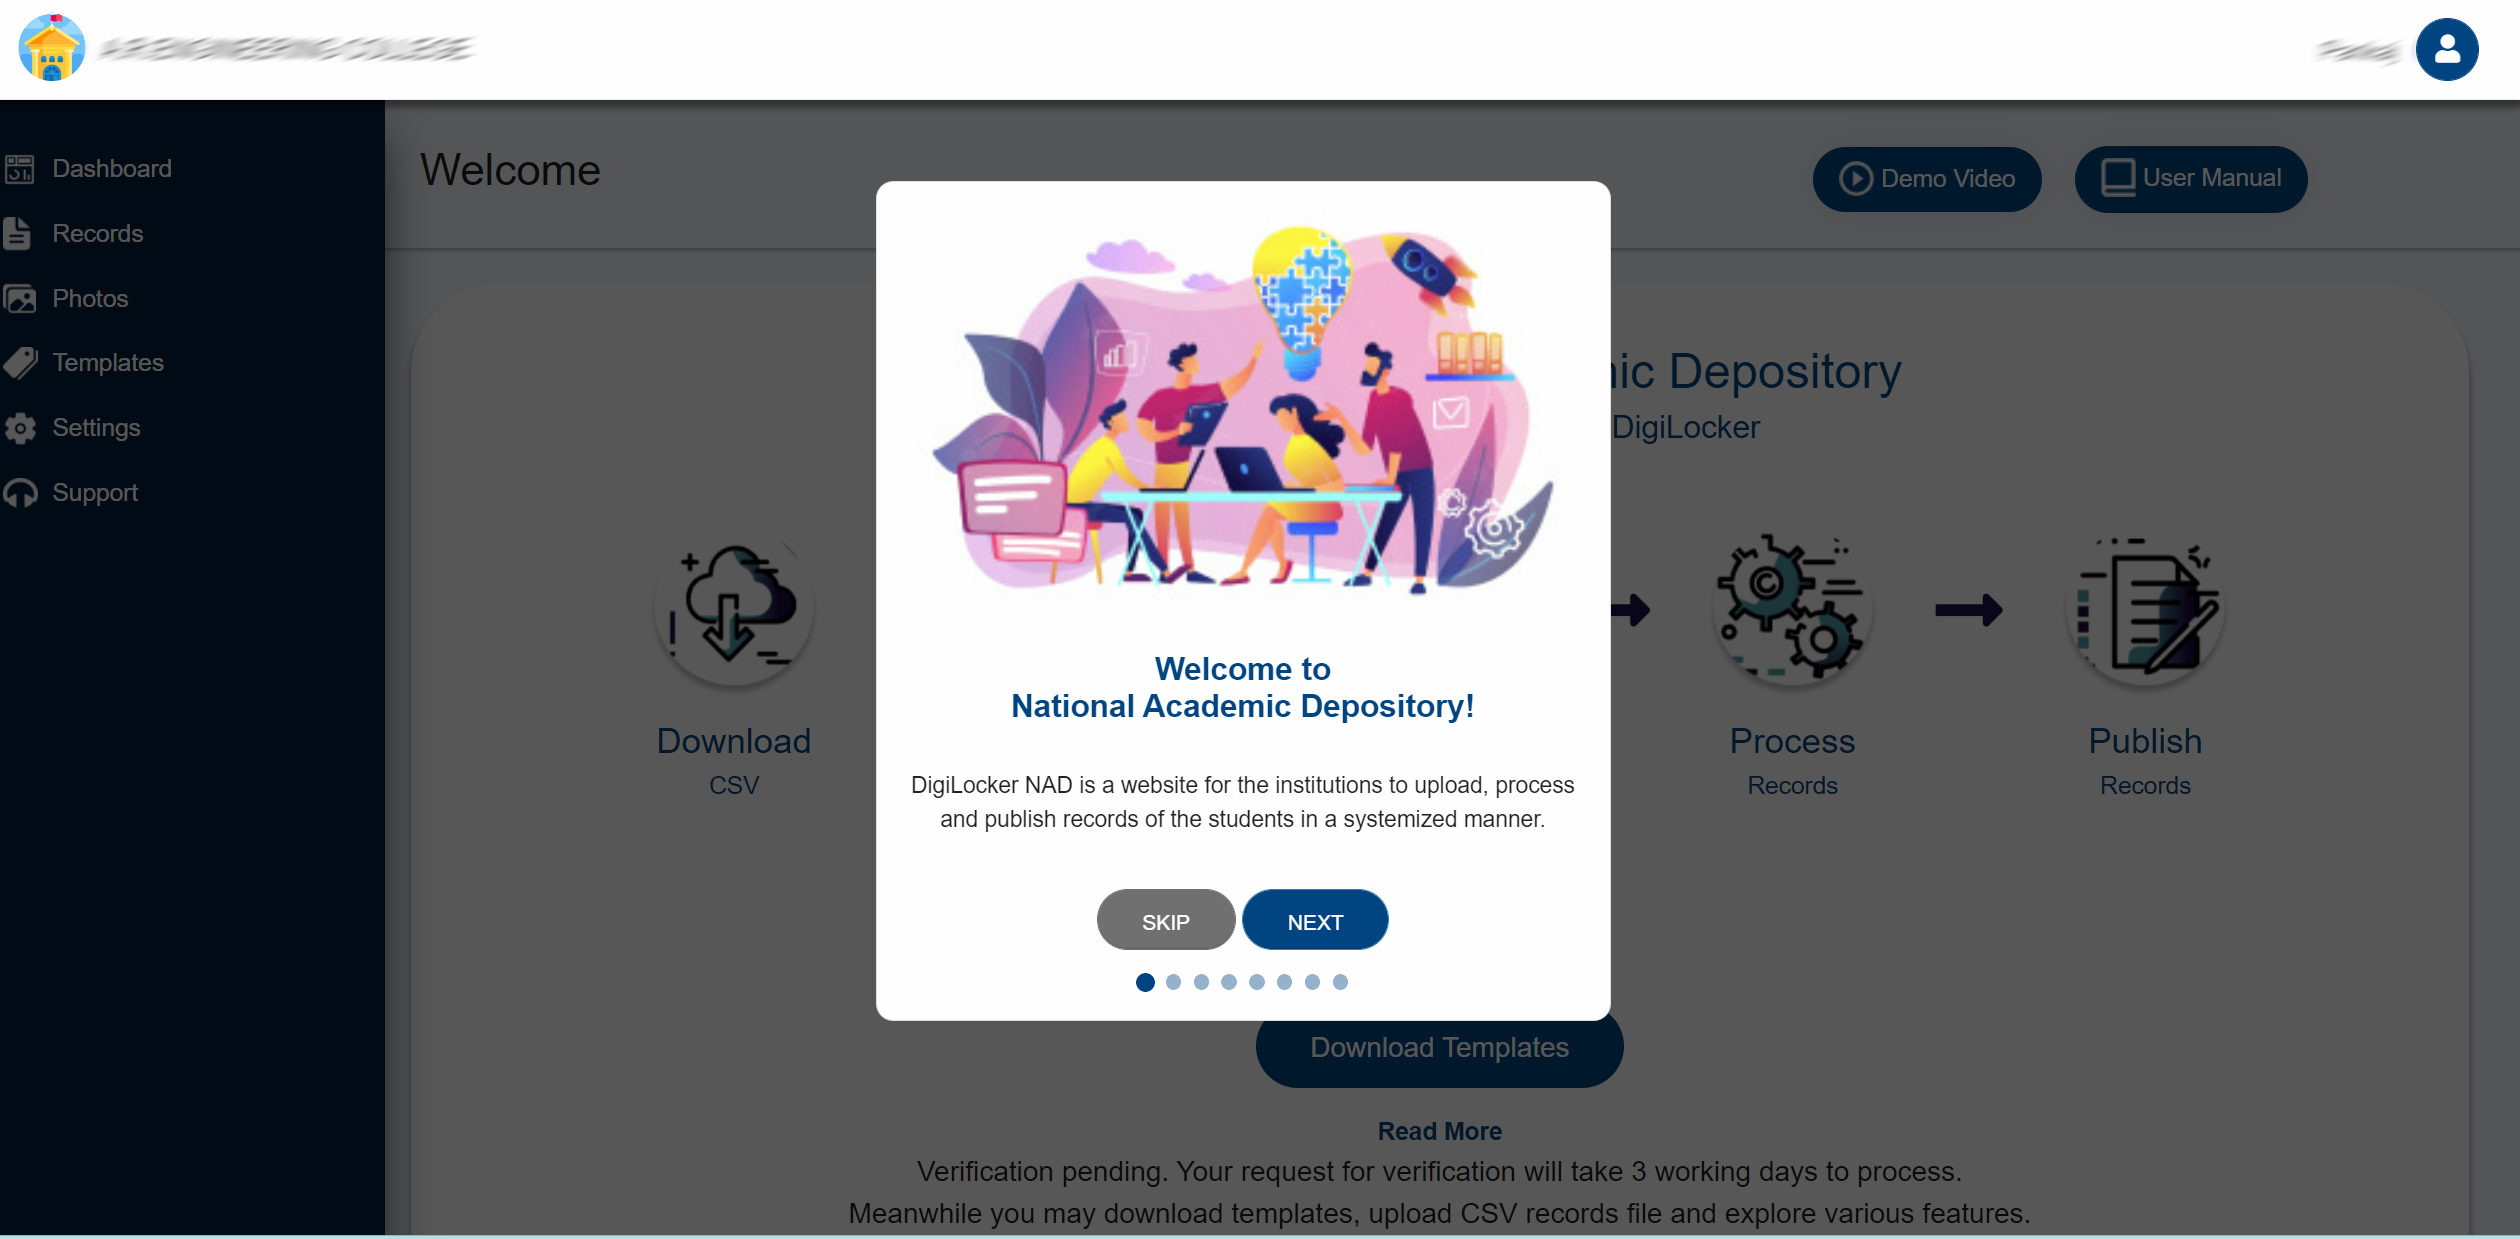
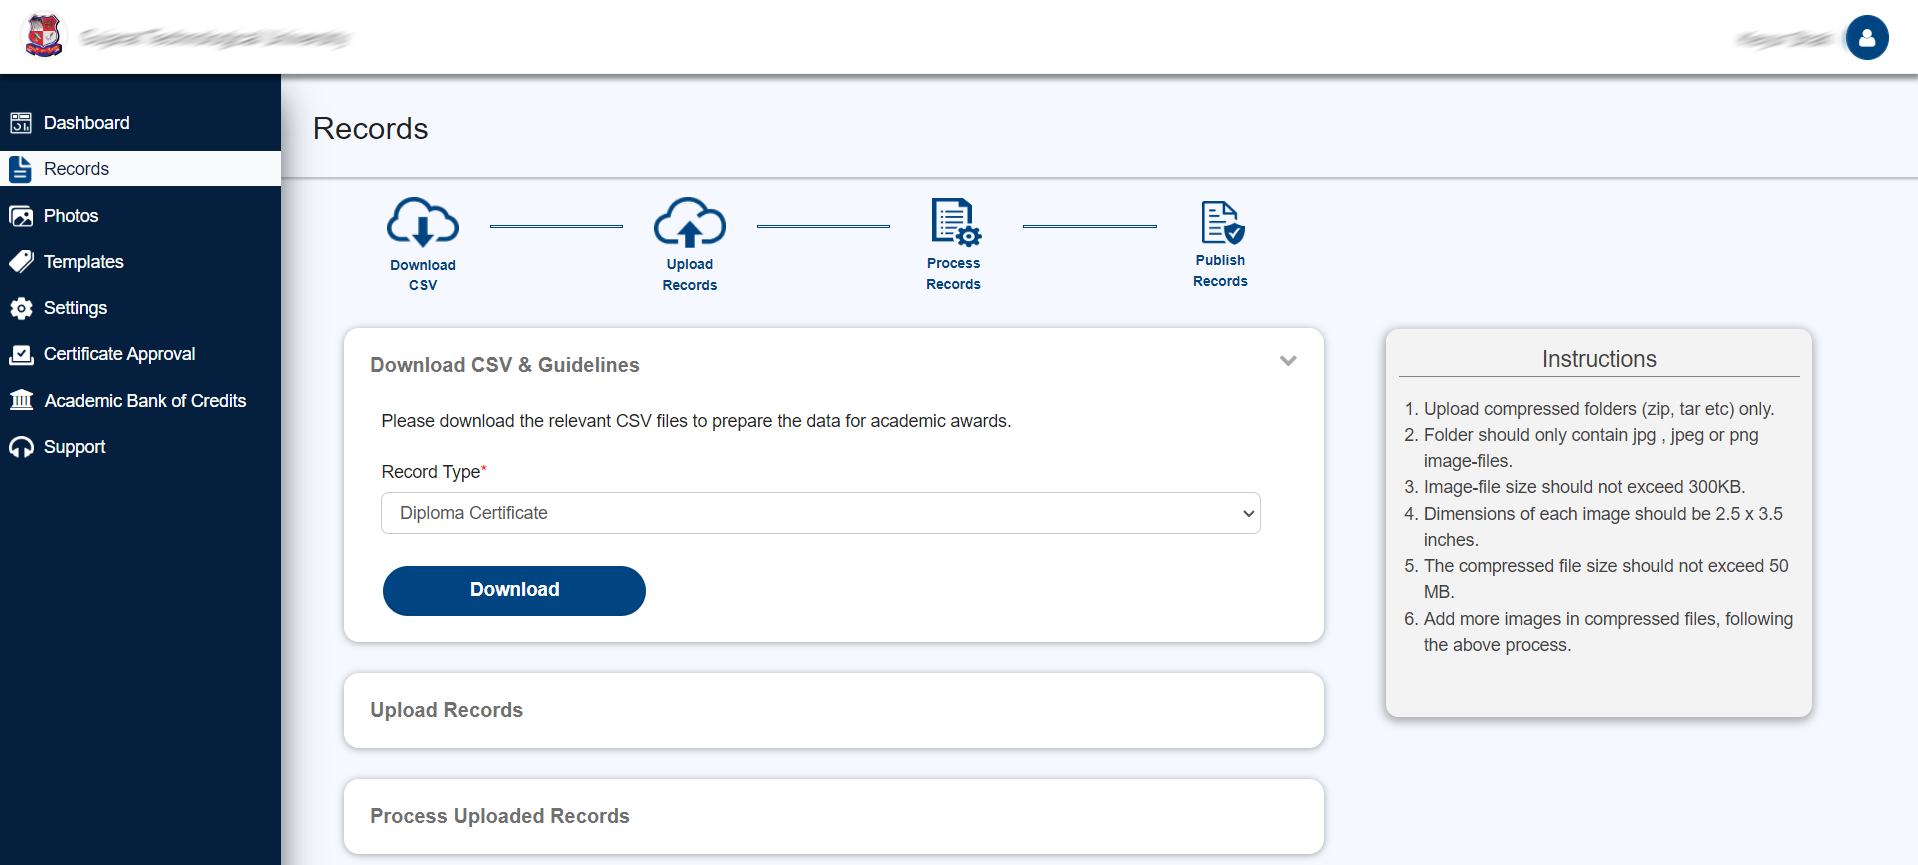
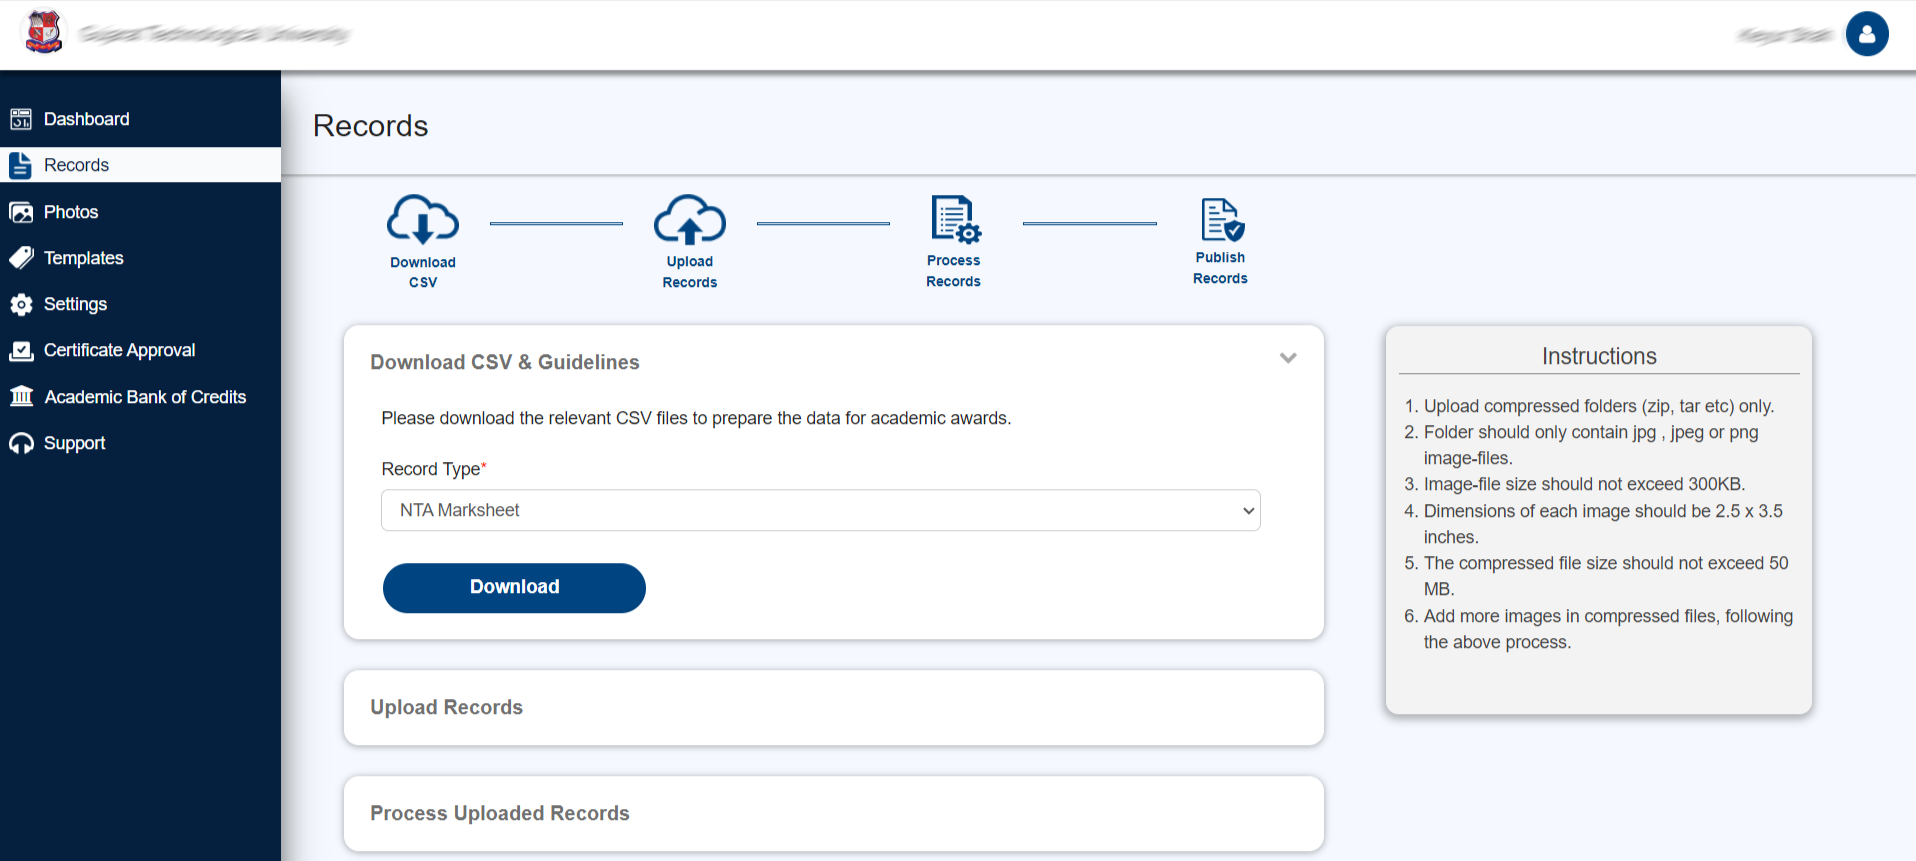
• Click on “Download Template” → explore a variety of standardized templates based on the “Record Type.” (You may select templates at this point)
• Click on “Read More” for a small step by step demo on how to upload students’ data
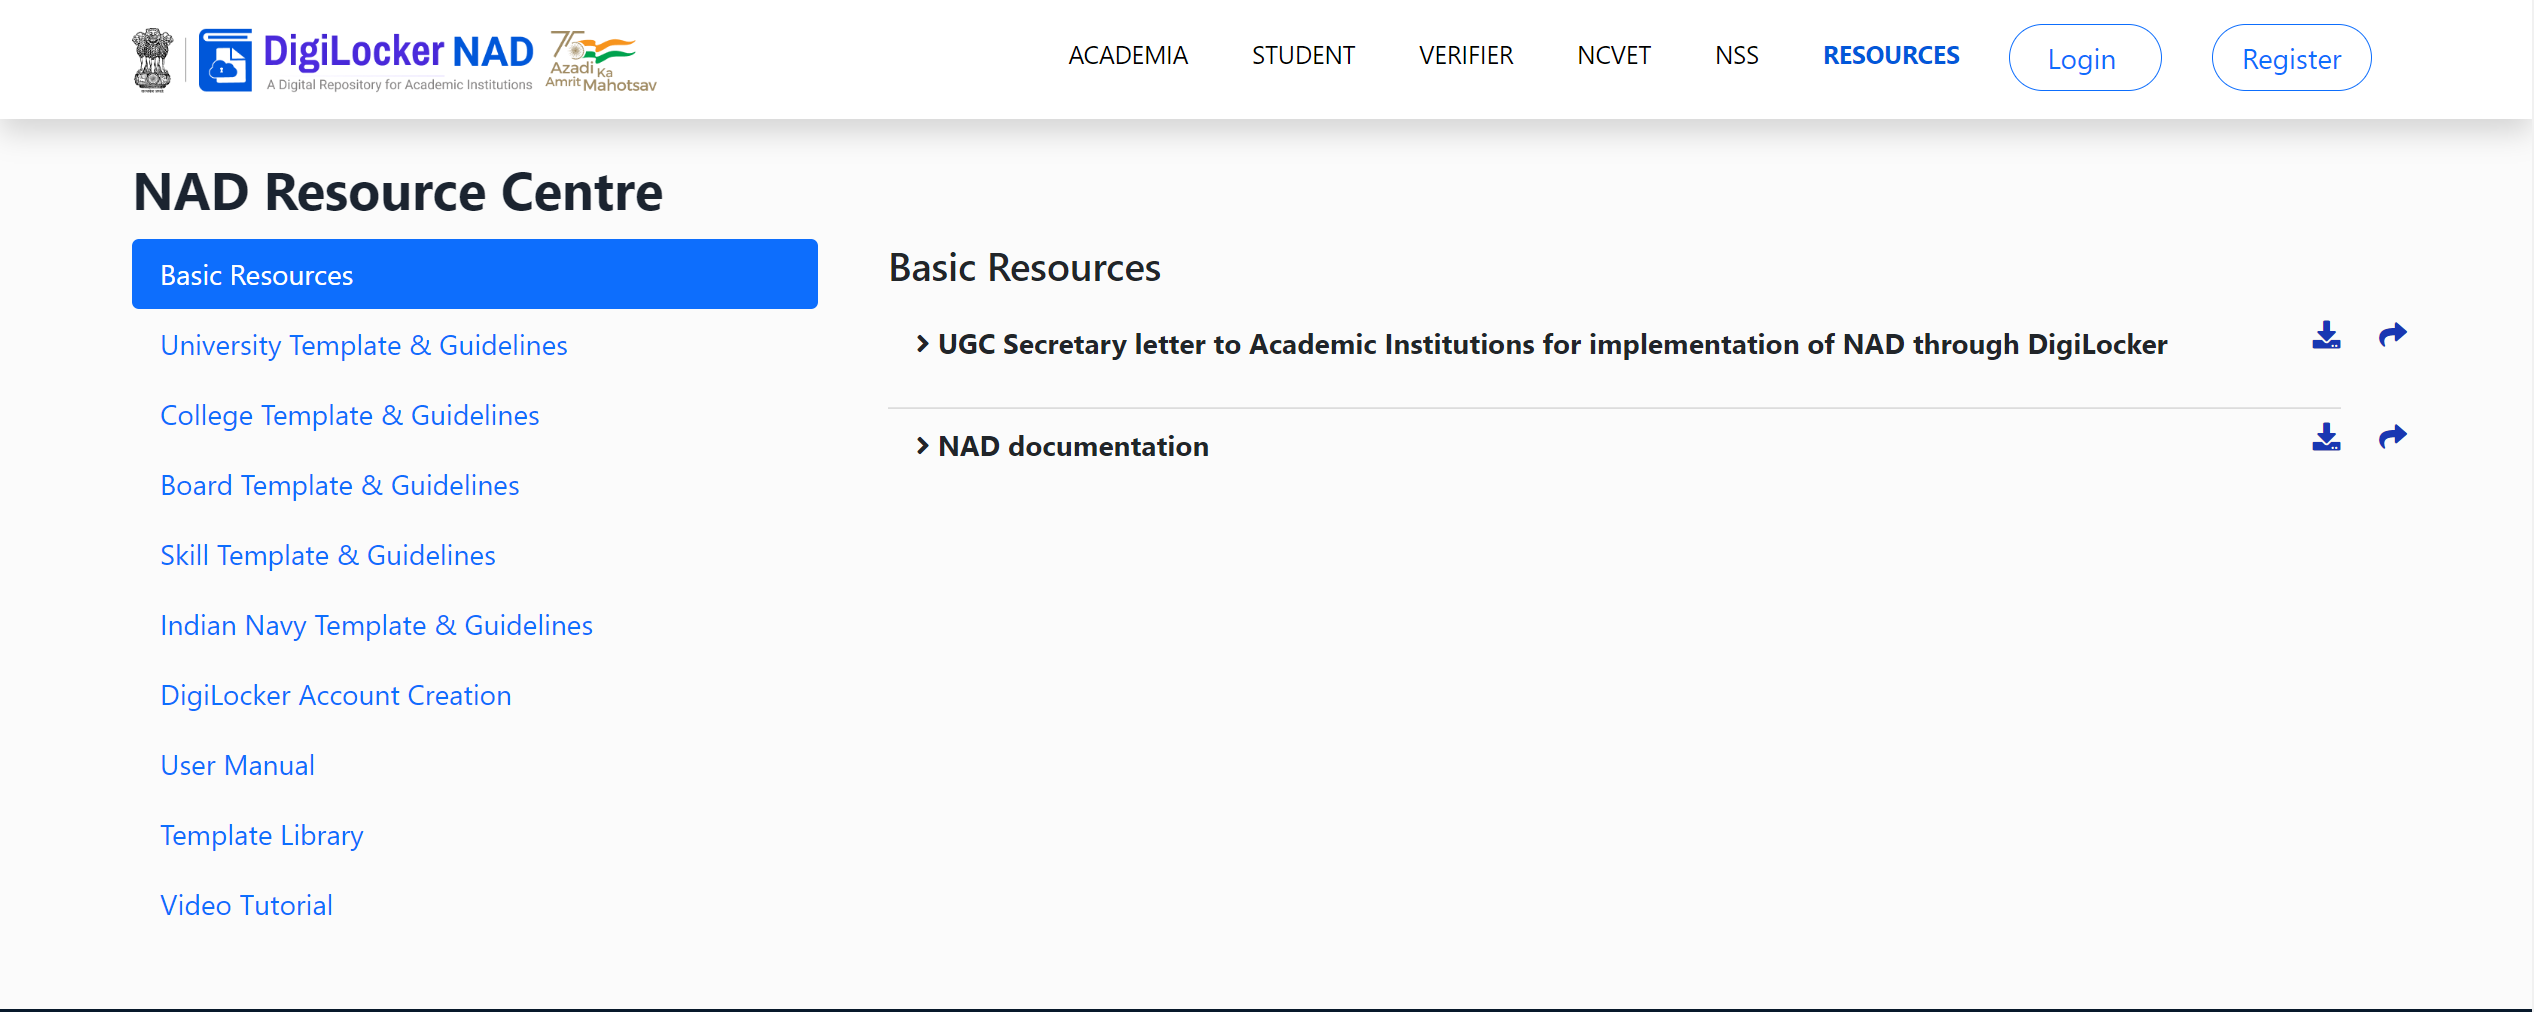
• Click on “Resource” for section-wise NAD Resources → Circulars, Policy documents, and Certificate Templates along with guidelines can be found at this part.
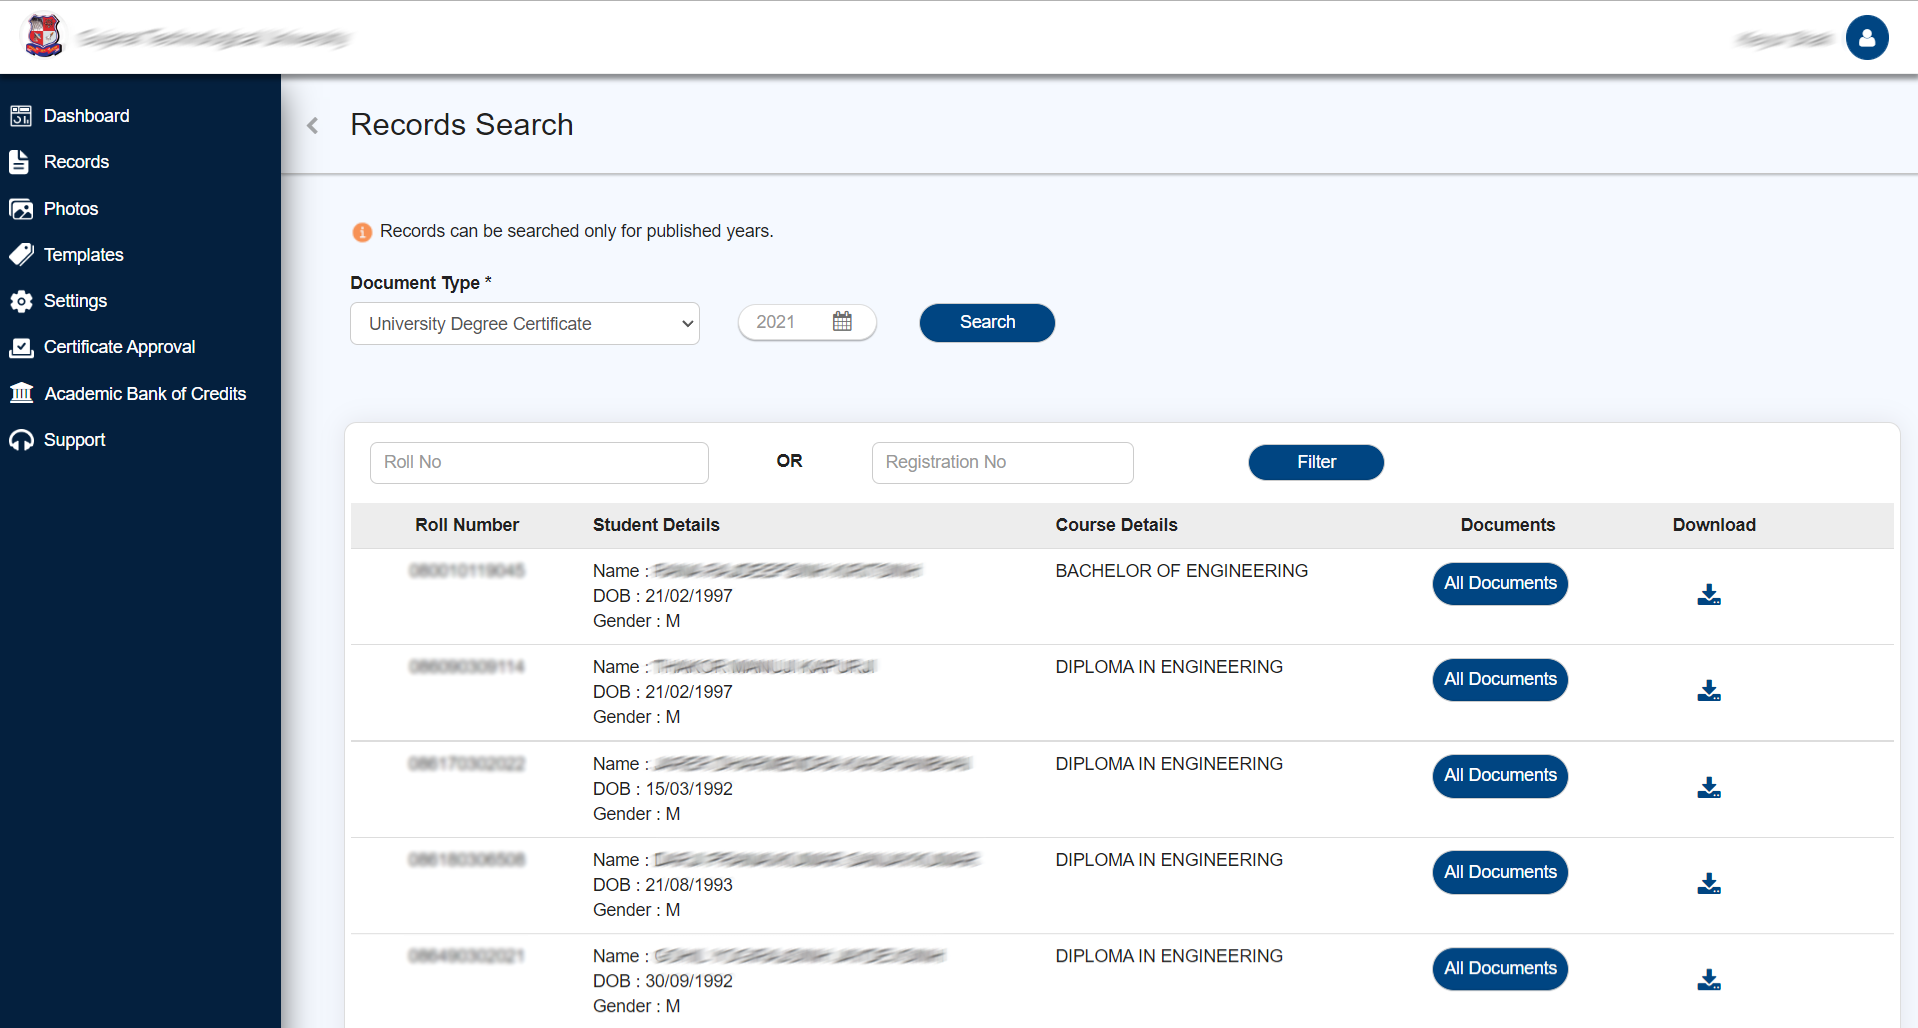
• Click on “Search”→ Enter Roll No./ Student Name/ Course Name→
•
Note: Detailed instructions for preparing template-specific CSV may be found in the dashboard’s Resources section.
• Once the data is prepared → Compress the .csv file in .zip format and keep it ready
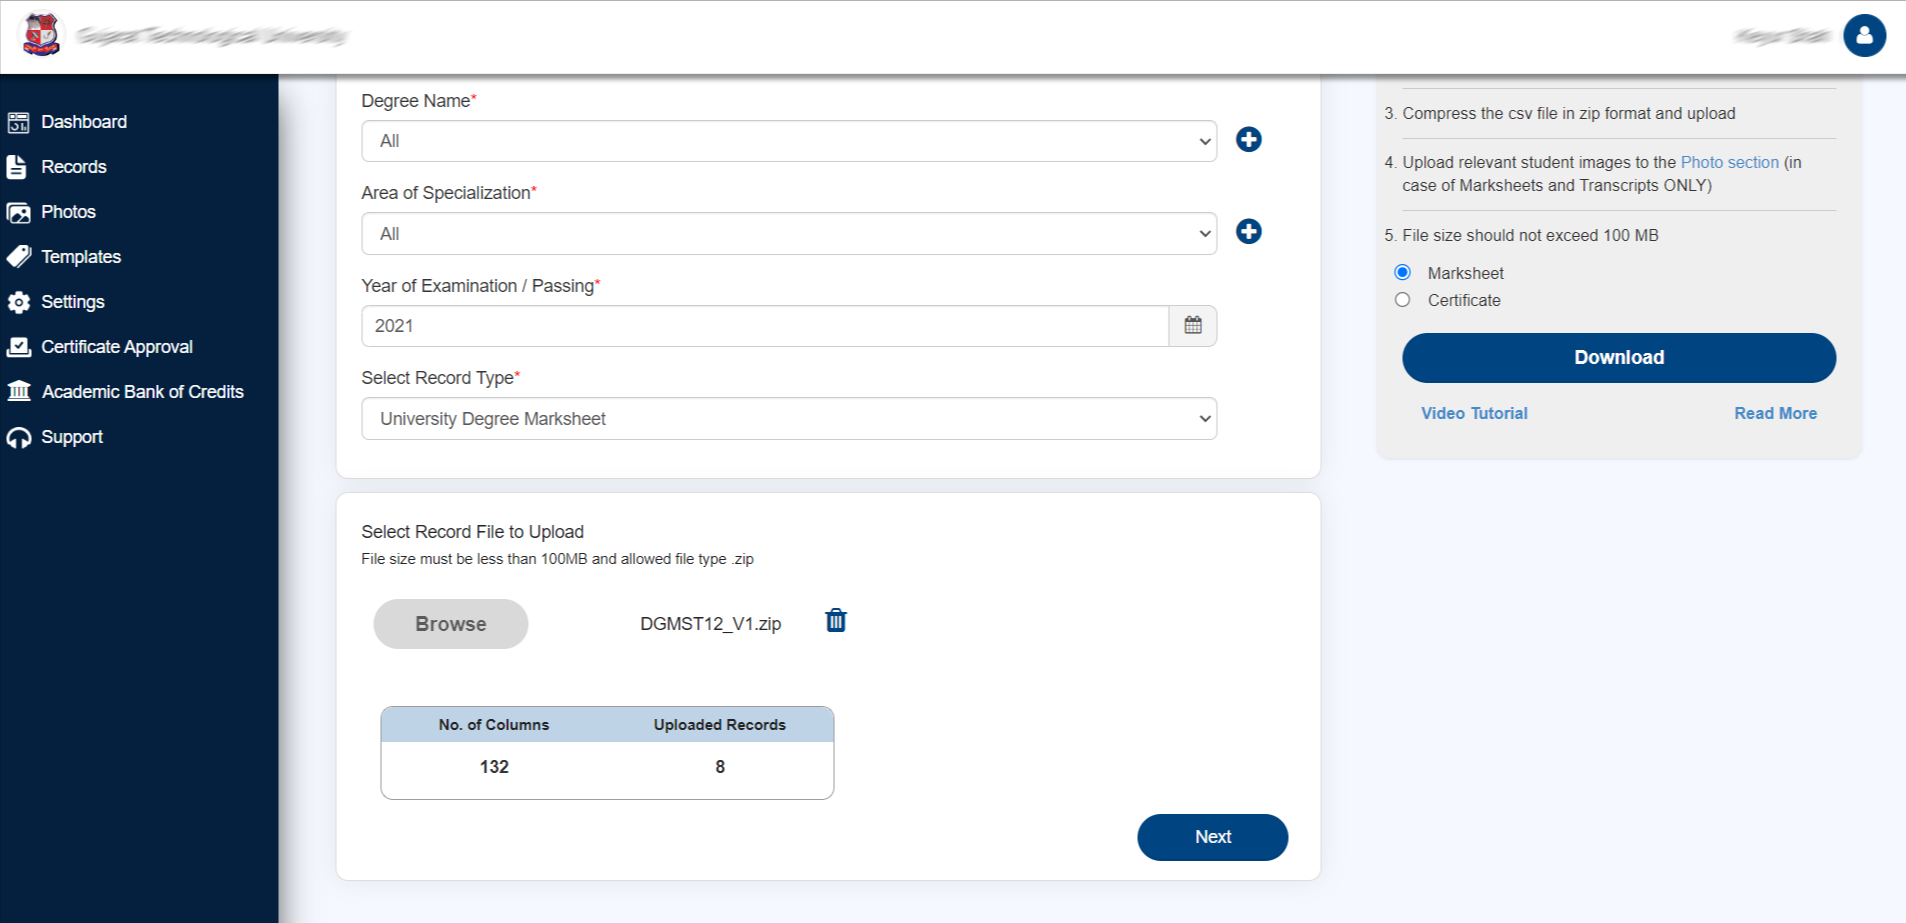
• Click on “Upload Records”→ Pick the desired “Department,” “Course Type,” “Degree Name,” “Area of Specialisation,” “Year of Examination,” and Record Type” for the data to be uploaded → Click on “Browse”→ select the record to upload→
Check on “Verify CSV Records.”
Note: The “Department,” “Course Type,” “Degree Name,” and “Area of Specialisation” choices may be left at “All,” however choosing these parameters correctly assists in obtaining a better picture of the uploaded data in the long term, and this is displayed under the Dashboard statistics summary page.
• When the Record file is uploaded→ a preview of the file structure gets shown → the system crosschecks whether the uploaded file data format is as a per reference CSV format → If standards are not met → error messages on each error gets shown as under
• If the data format is fine → green ticks can be seen → check “Verify CSV Records”→click “Next” button
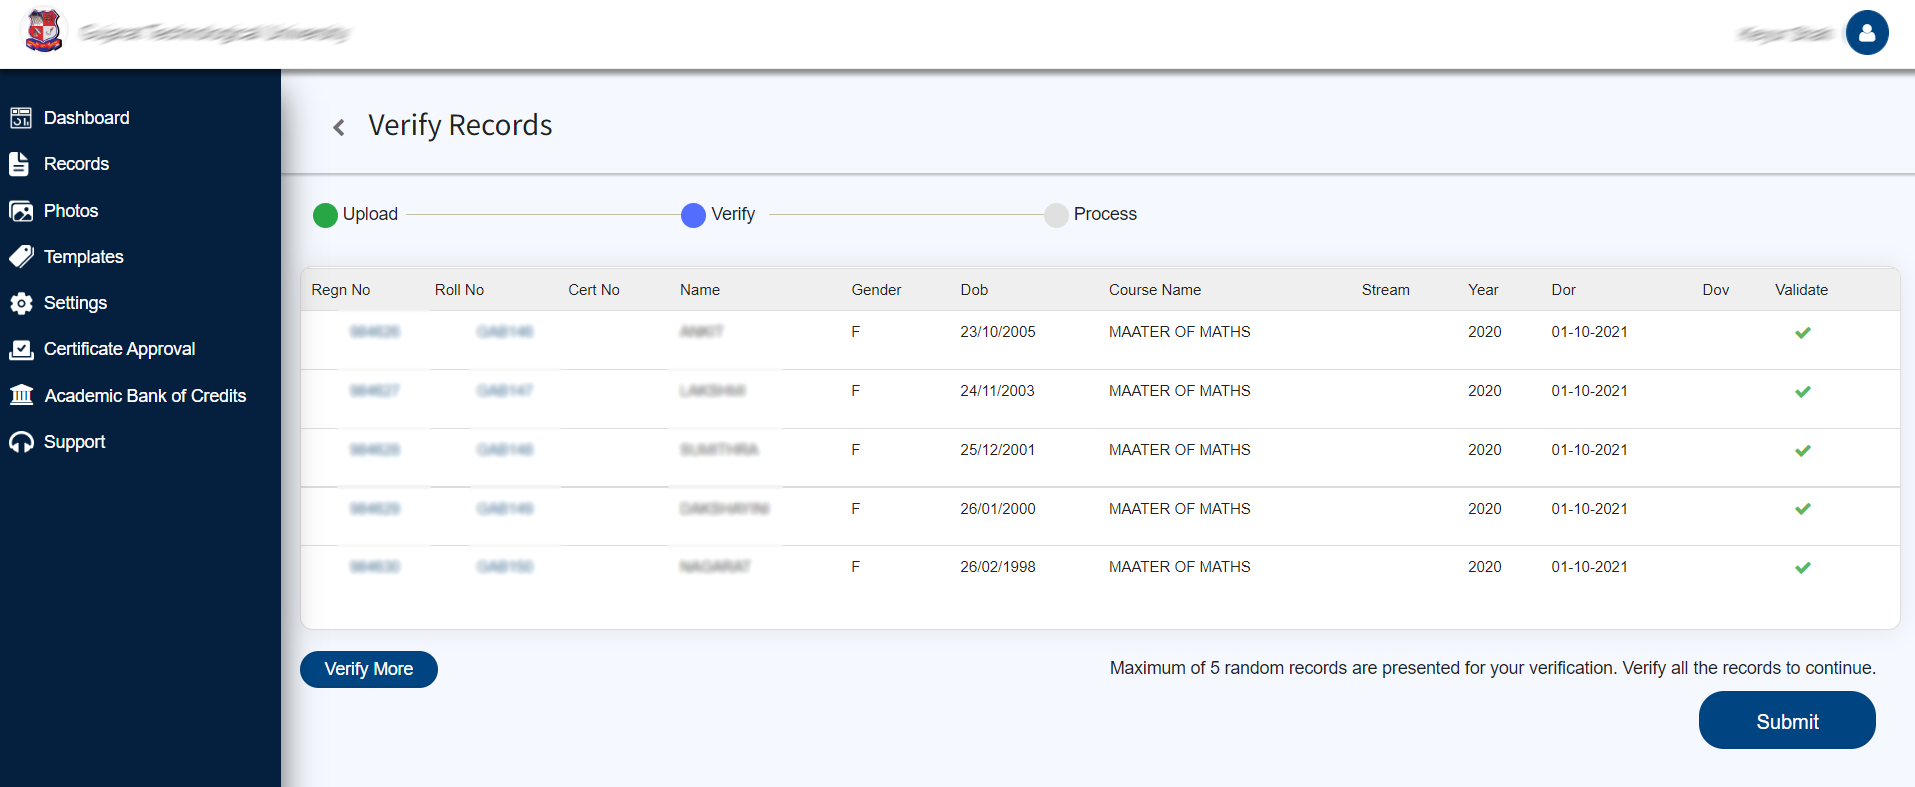
Verify Records: A sample of 5 random records gets shown as under
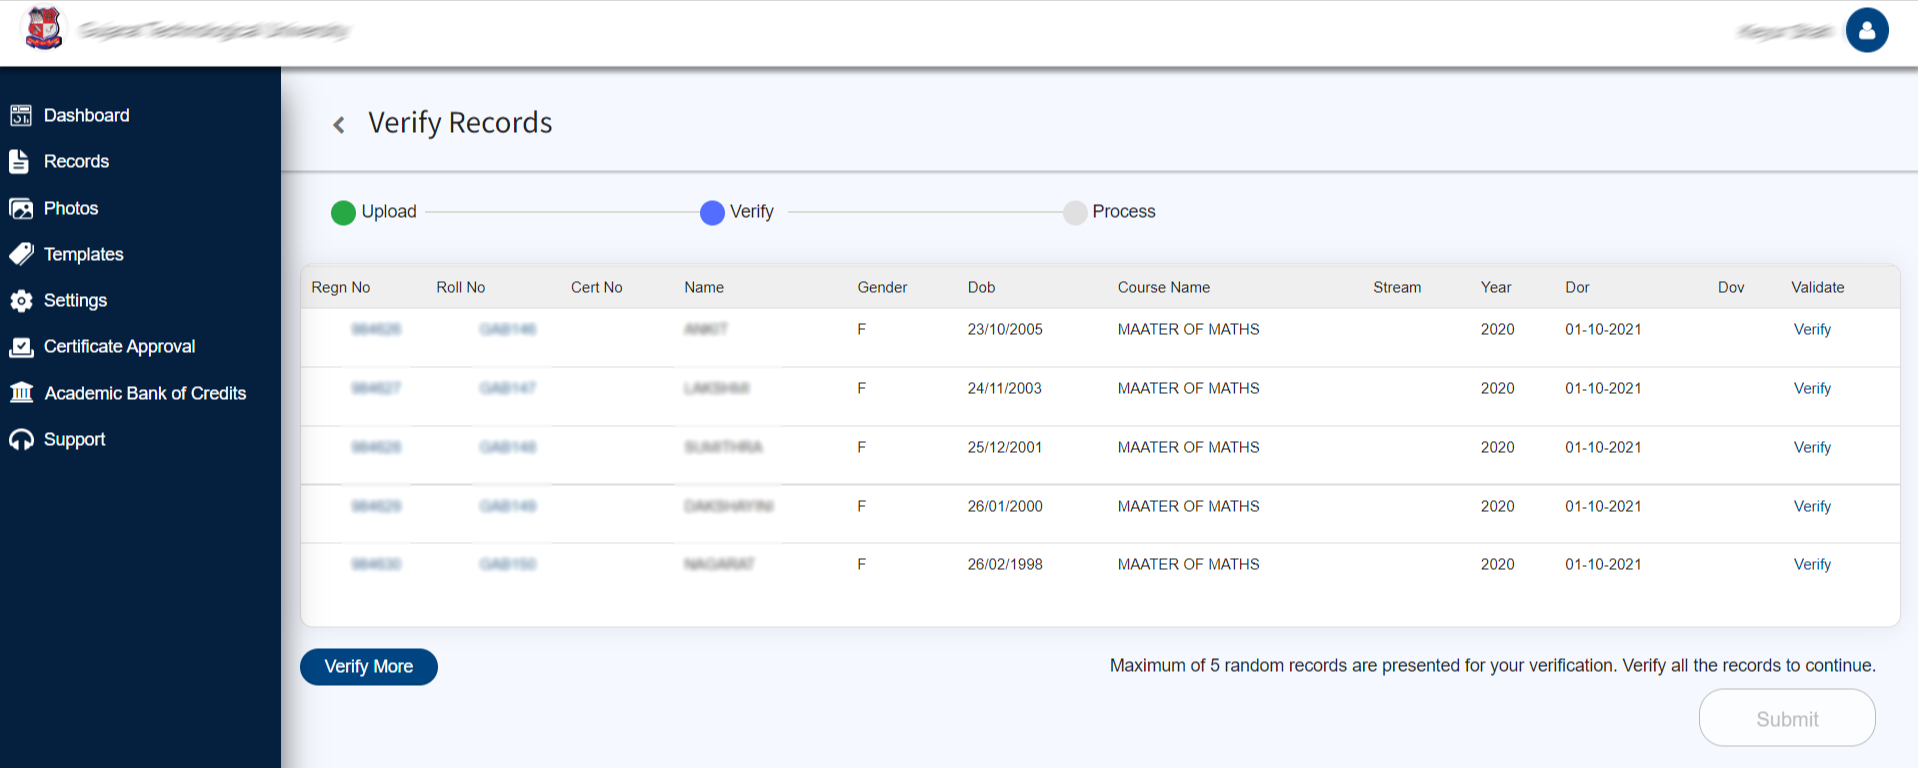
• Click on “Verify” → a preview of the mark sheet (based on the opted template) gets shown as under
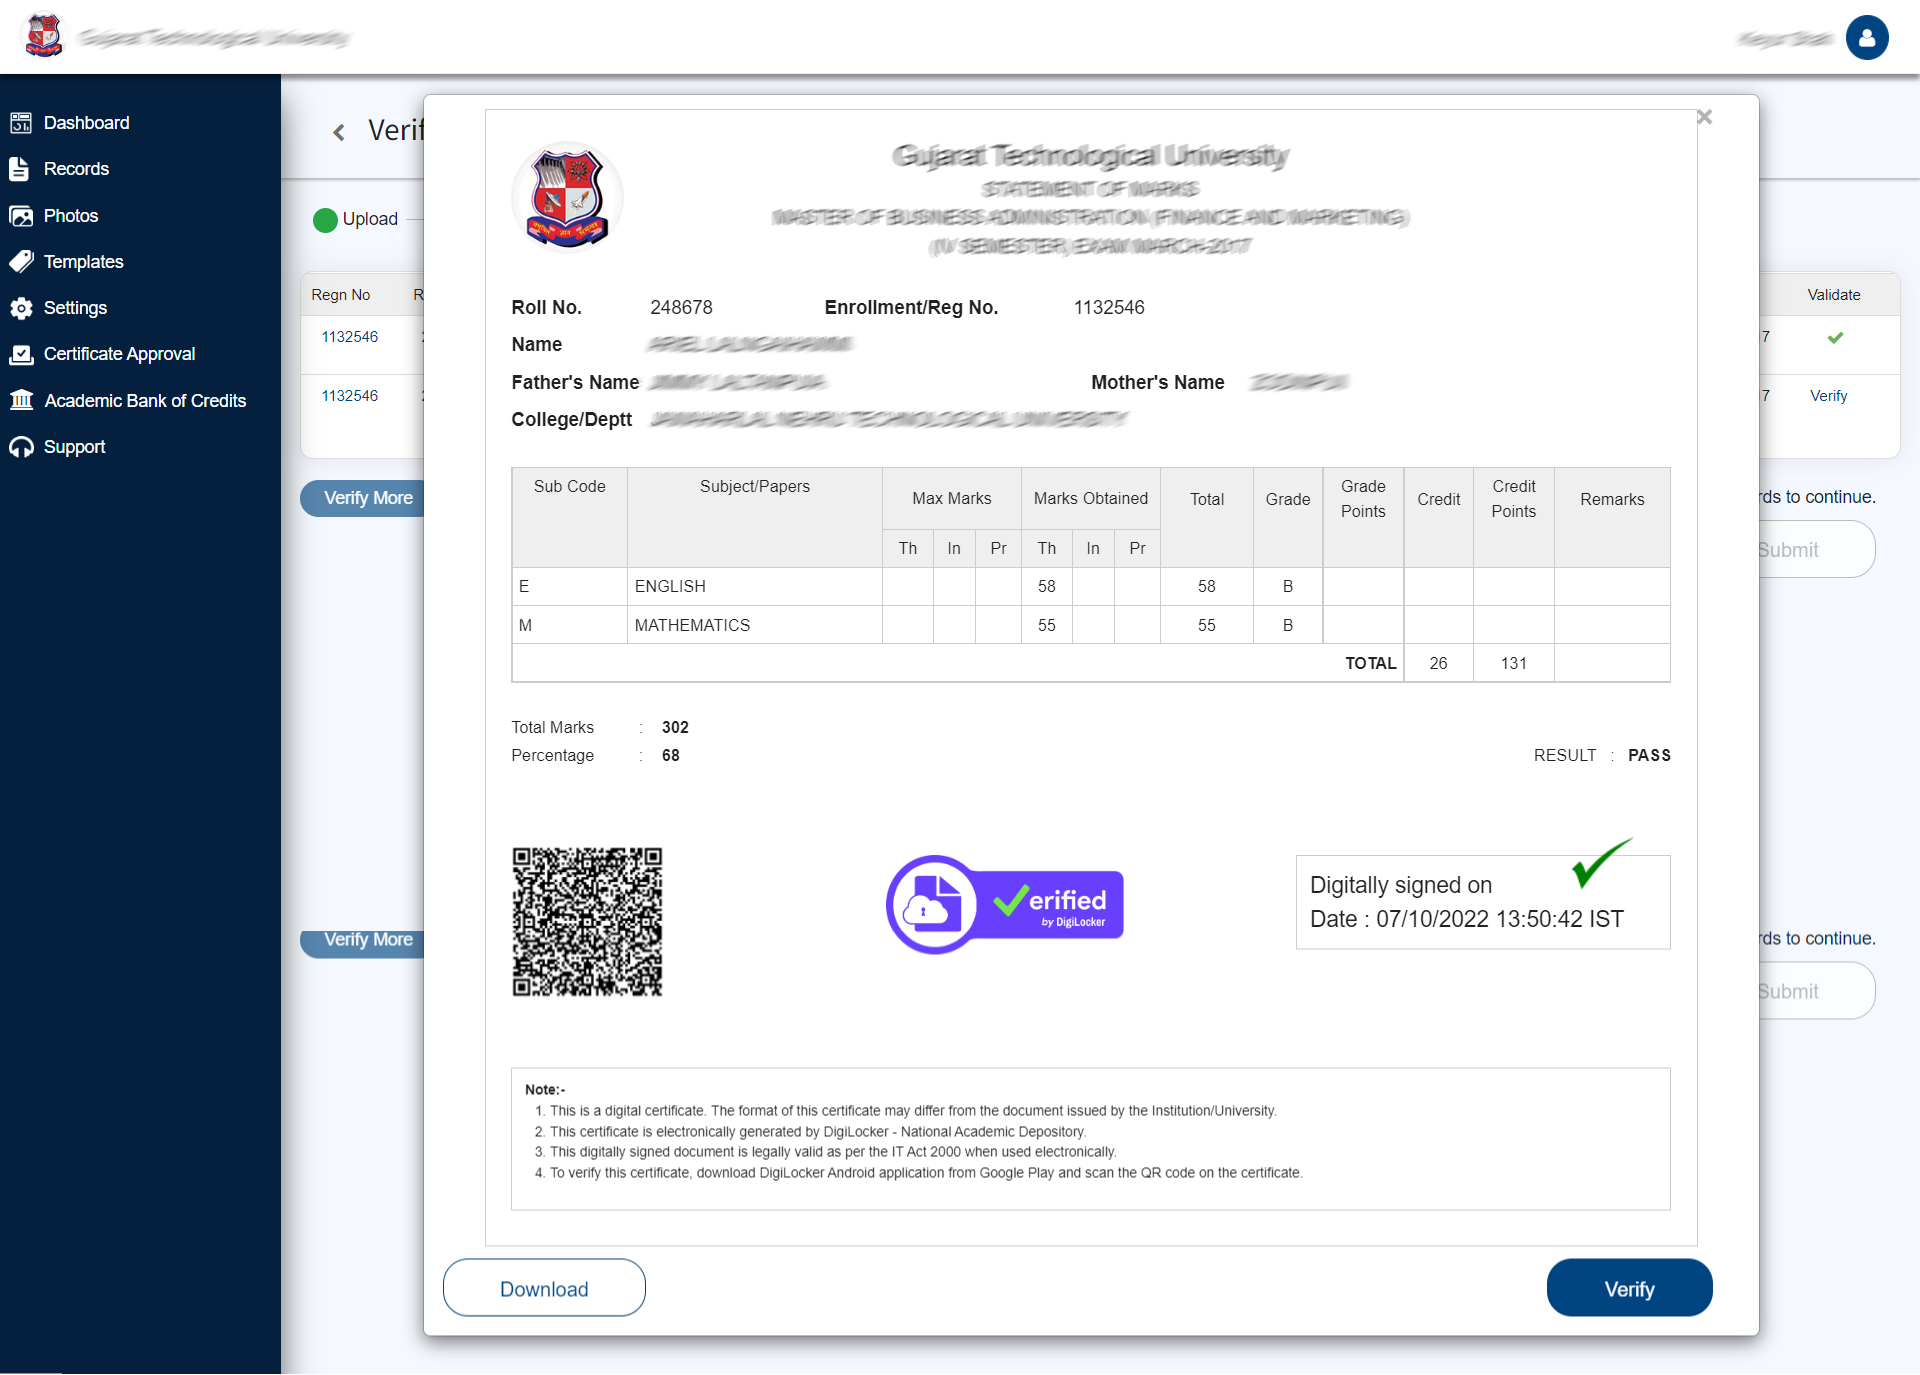
• Ensure whether the award data is imprinted as desired → Click on “Verify” → verify each of the random Marksheets
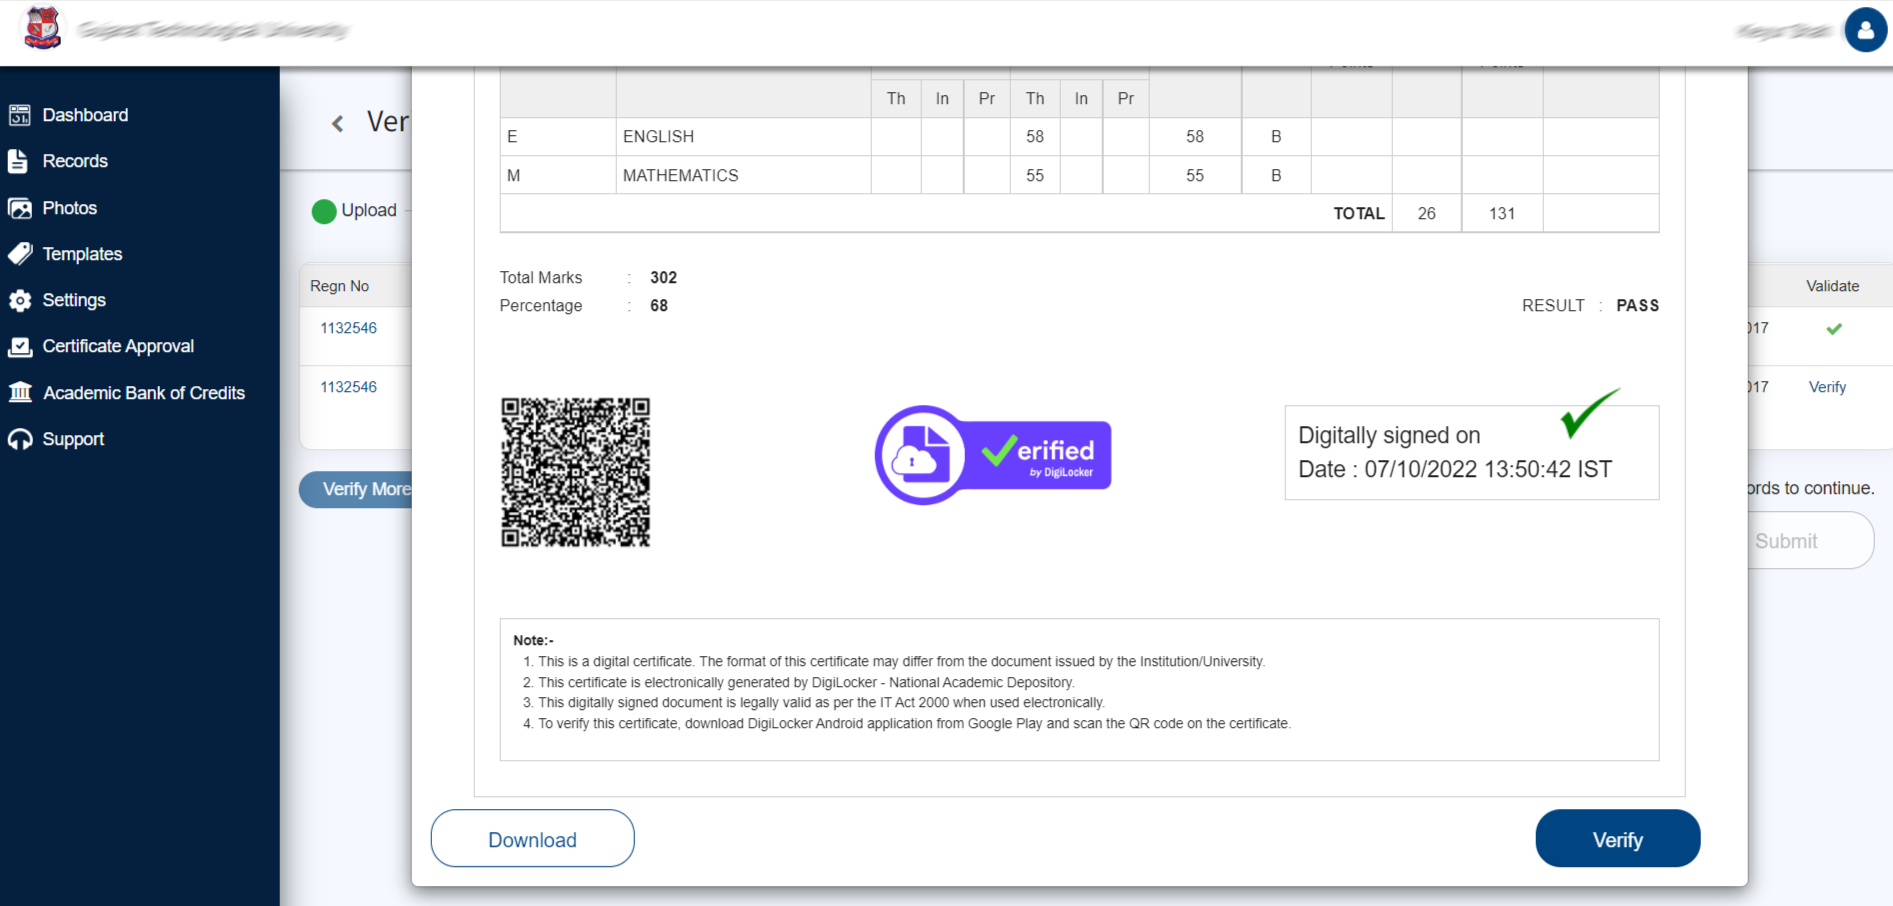
• You may even download a copy of the preview marksheet by clicking the “Download” button
• Once all five random marksheets get verified → Click on “Submit” → Uploaded files get queued and later gets published
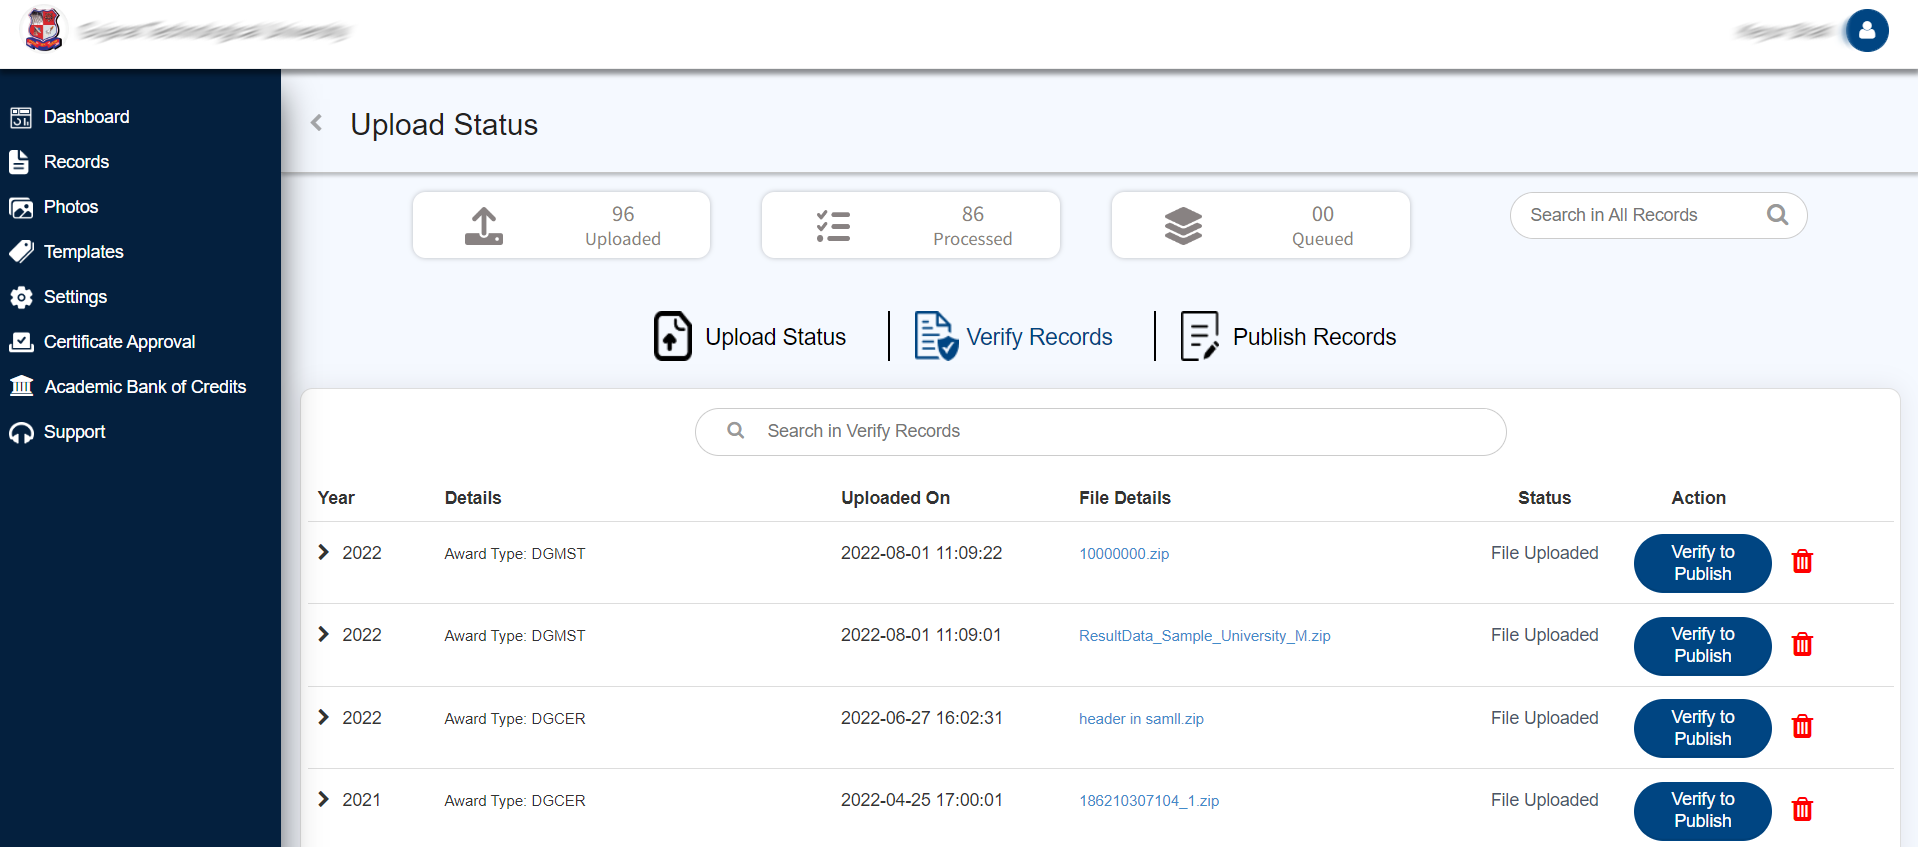
• The status of the upload can be seen under the “Upload Status” section
Note: Photos to be displayed on the certificates (especially for Marsheets and transcripts) must be added under the “Photos” section.

• Upload Status has two section’s (i) A brief infographics of the Upload activity (ii) Individual Yearwise Detailed uploaded activity and status with actions
• Click on “Upload Status” → Lastest Uploaded activity will be shown as under
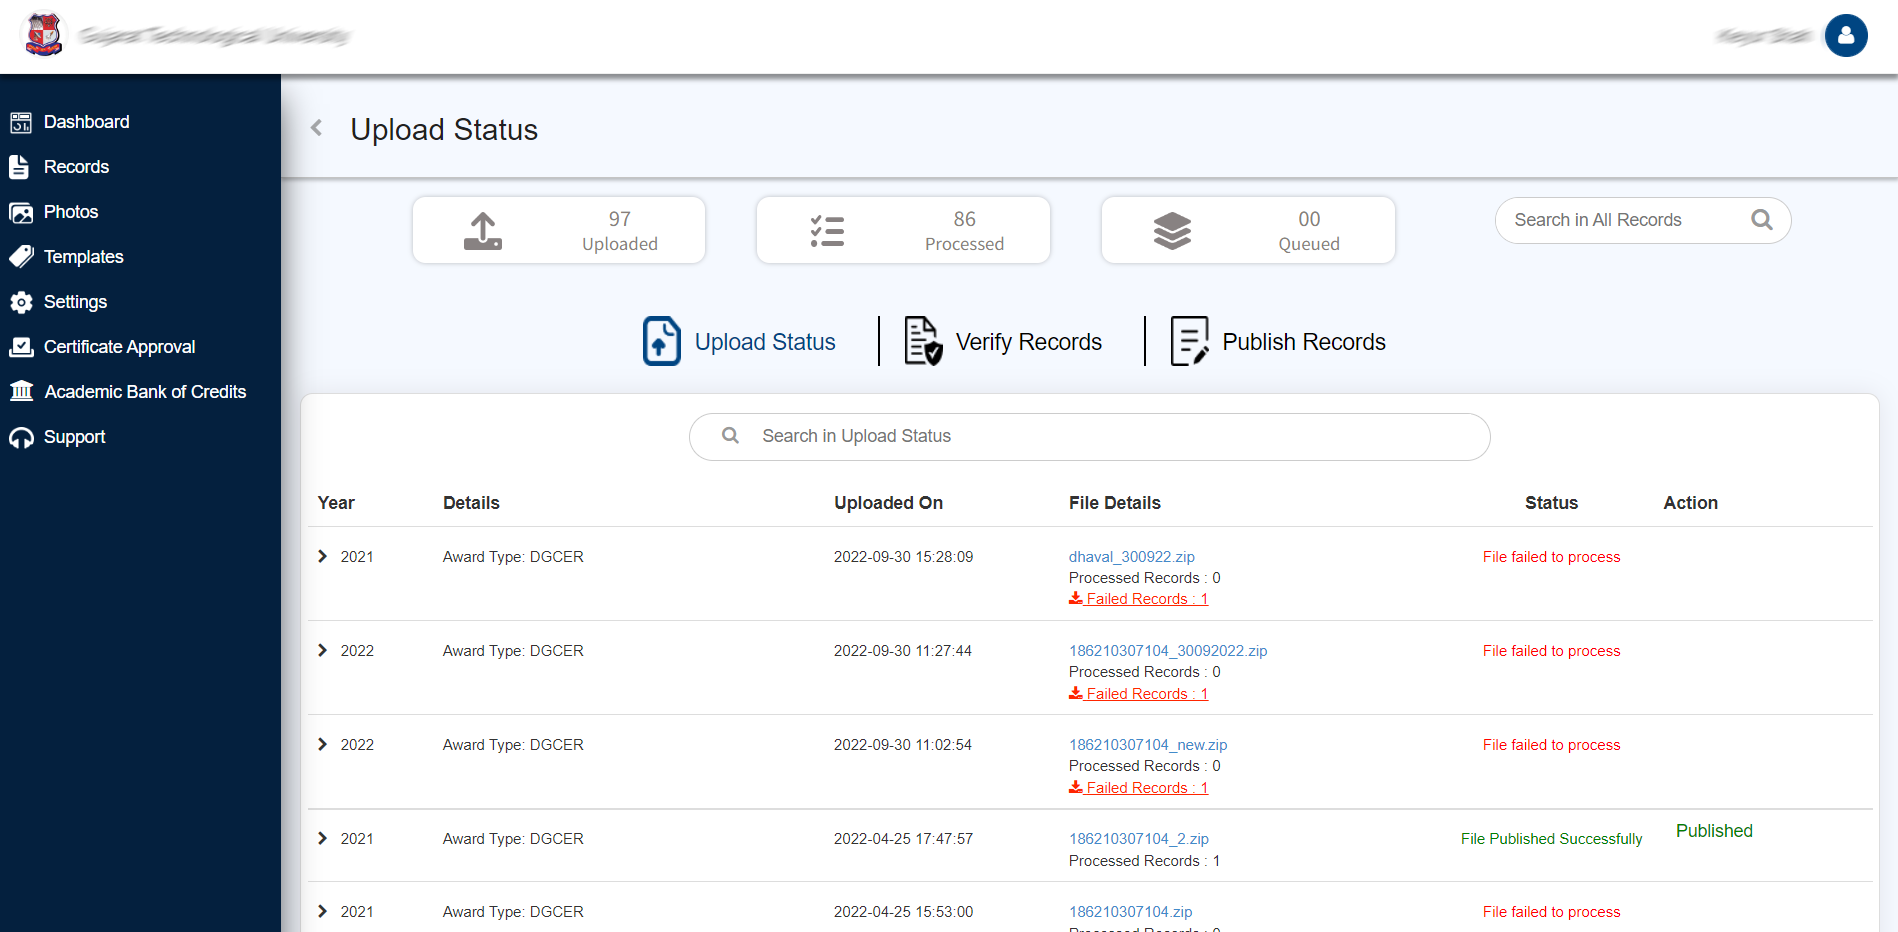
• The brief infographics show how many upload actions were initiated and how many were successfully processed and how many are under queued, i.e., still processing
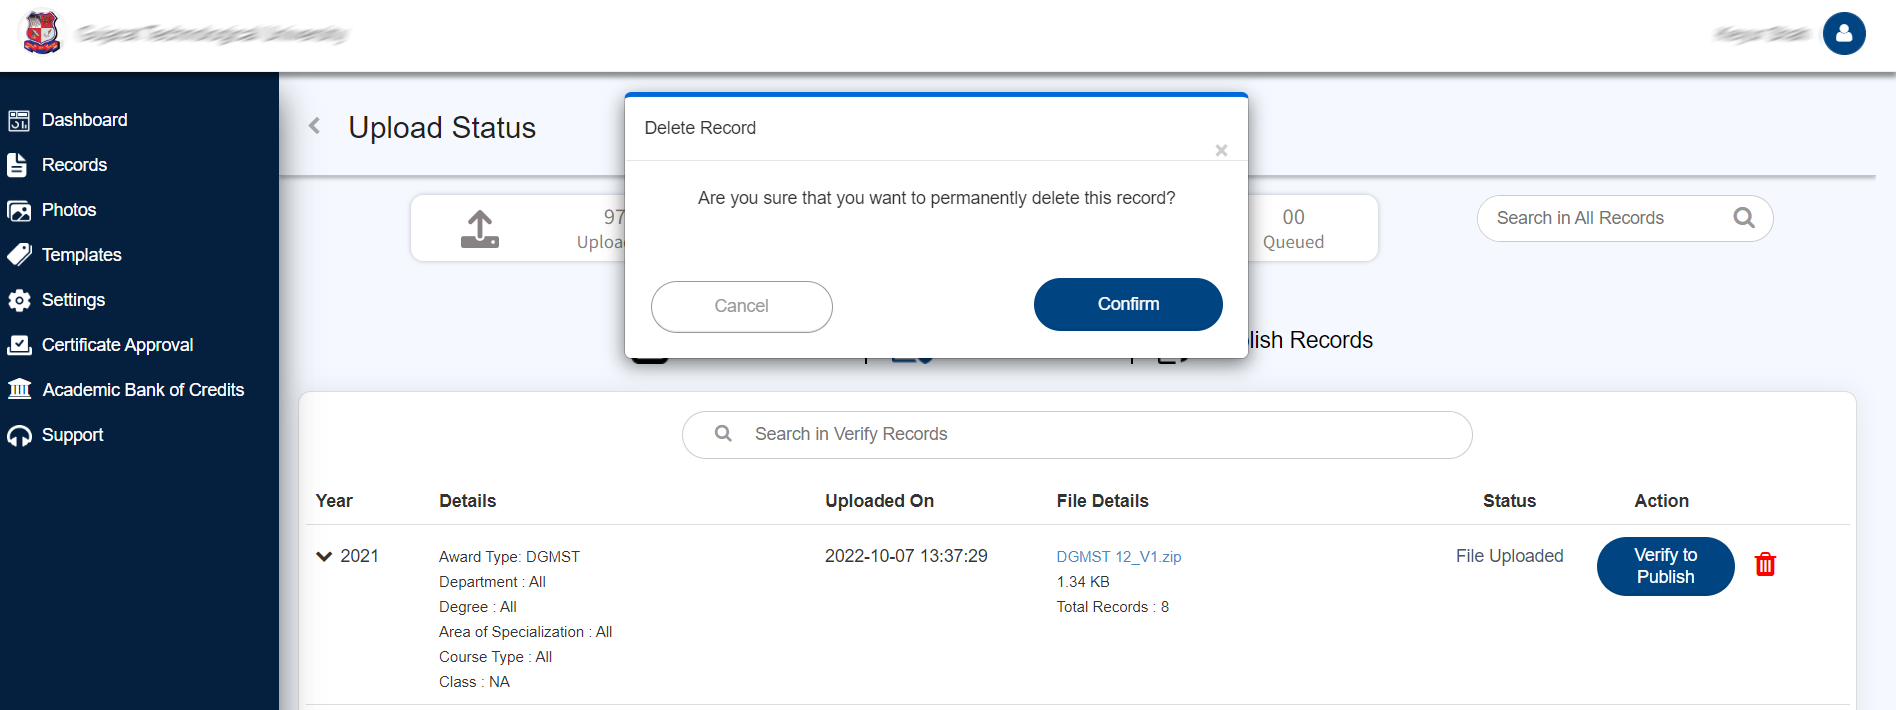
• Click on "verify to publish" to verify and process the incomplete processeson to verify and process the incomplete processes
• Click on  to delete the activity
• This part contains information on when student data was published, amended, and who has performed these activities.
• Prepare the photos folder by adhering to the instructions → Filename of each image must be relevant Roll No or Regn. No → Folder name must be the prevalent year of record you have uploaded earlier → Should be compressed into .zip format → only .jpg and .png formats with should not exceed 300 kb and with the dimensions of 2.5x3.5 inches are allowed
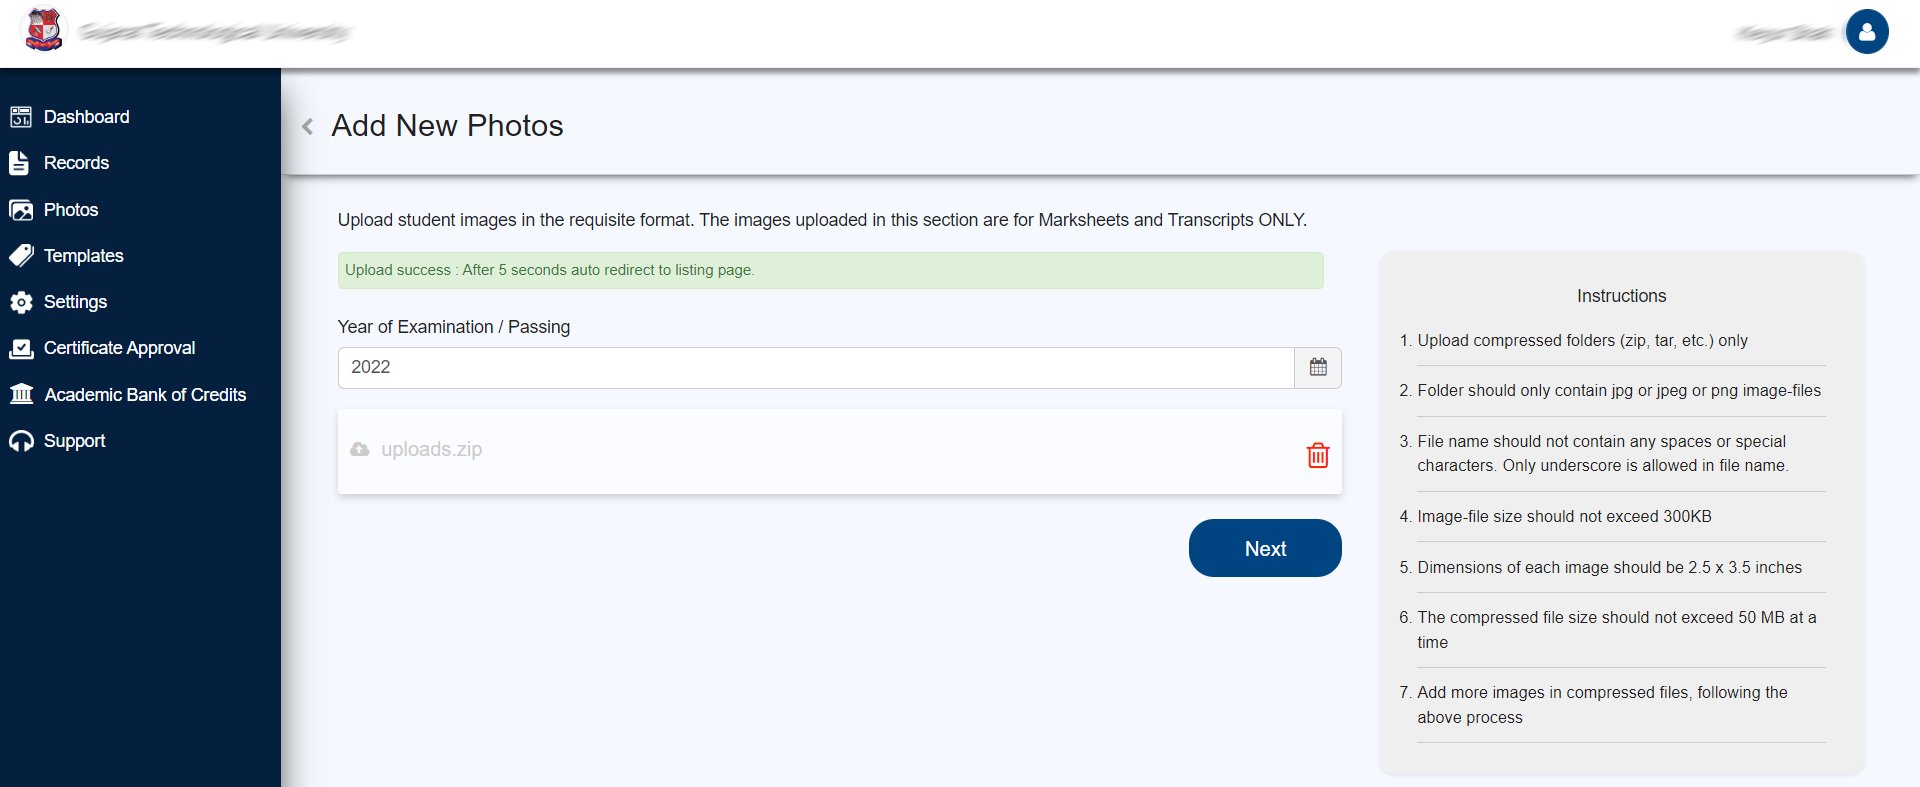
Note: Before moving on to the Photos part, CSV data must first be submitted under the Record Section.


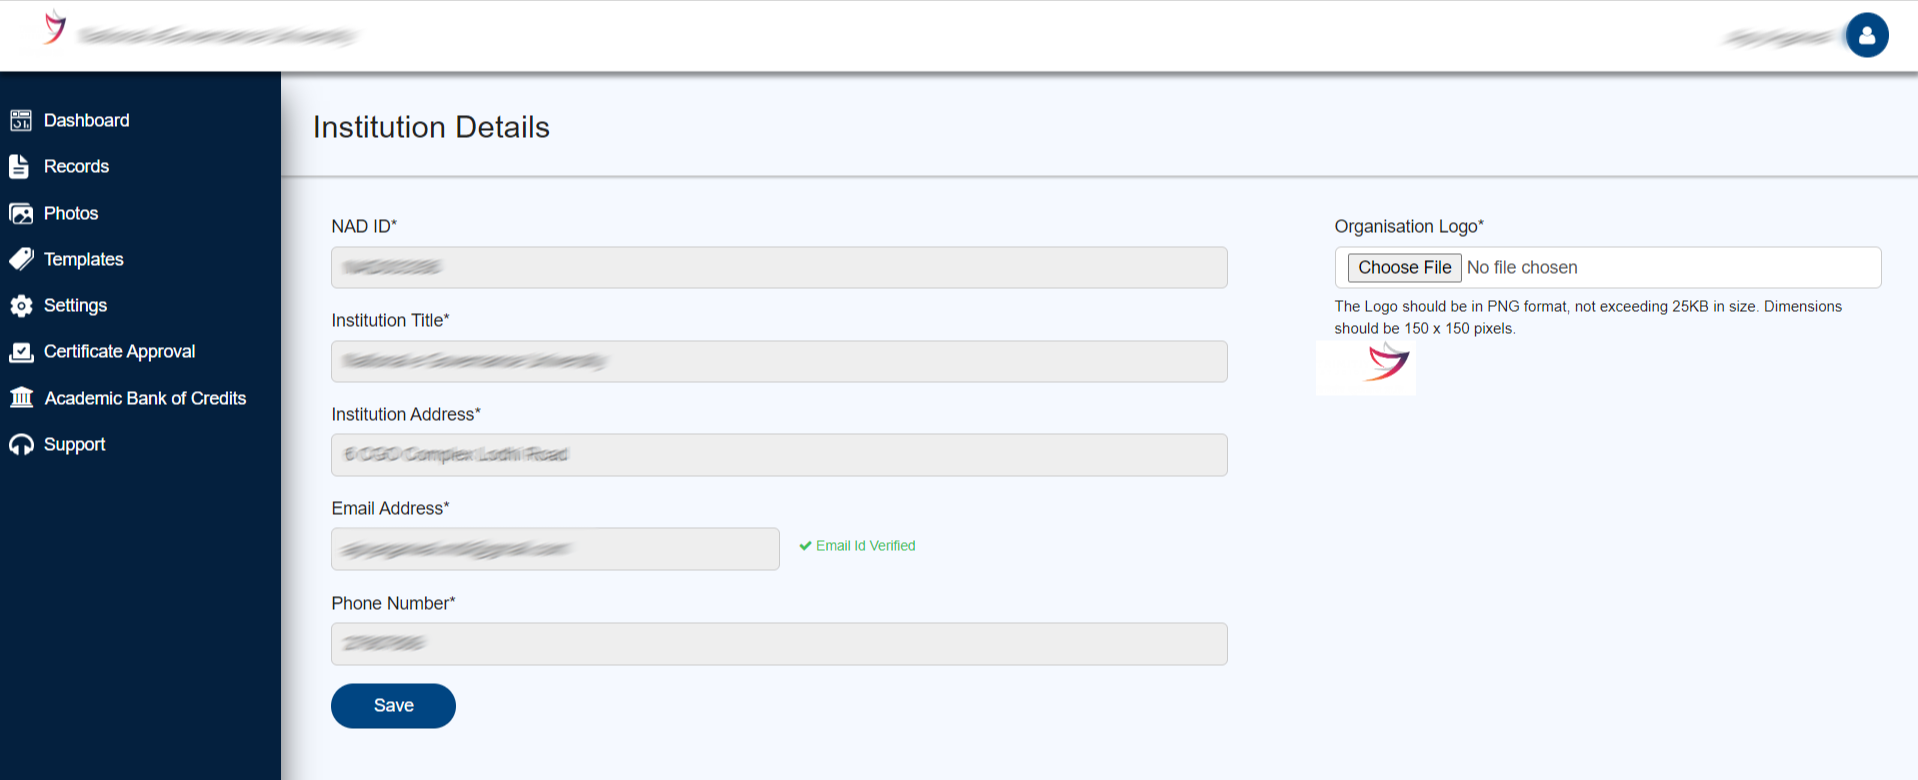
Note:Details here are auto-populated from the information given by the academic institutions appropriate Regulators;any change to be made can be requested by contacting the DigiLocker NAD support team via your institutions official email 1D with necessary Supporting documents.
Note:Options like 3.Departments,4.Degree Course and 5.Area of Specialisation helps in creating a database of curriculum that your institution has offered.


Note:Please select the appropriate document type at the time of uploading of record data.
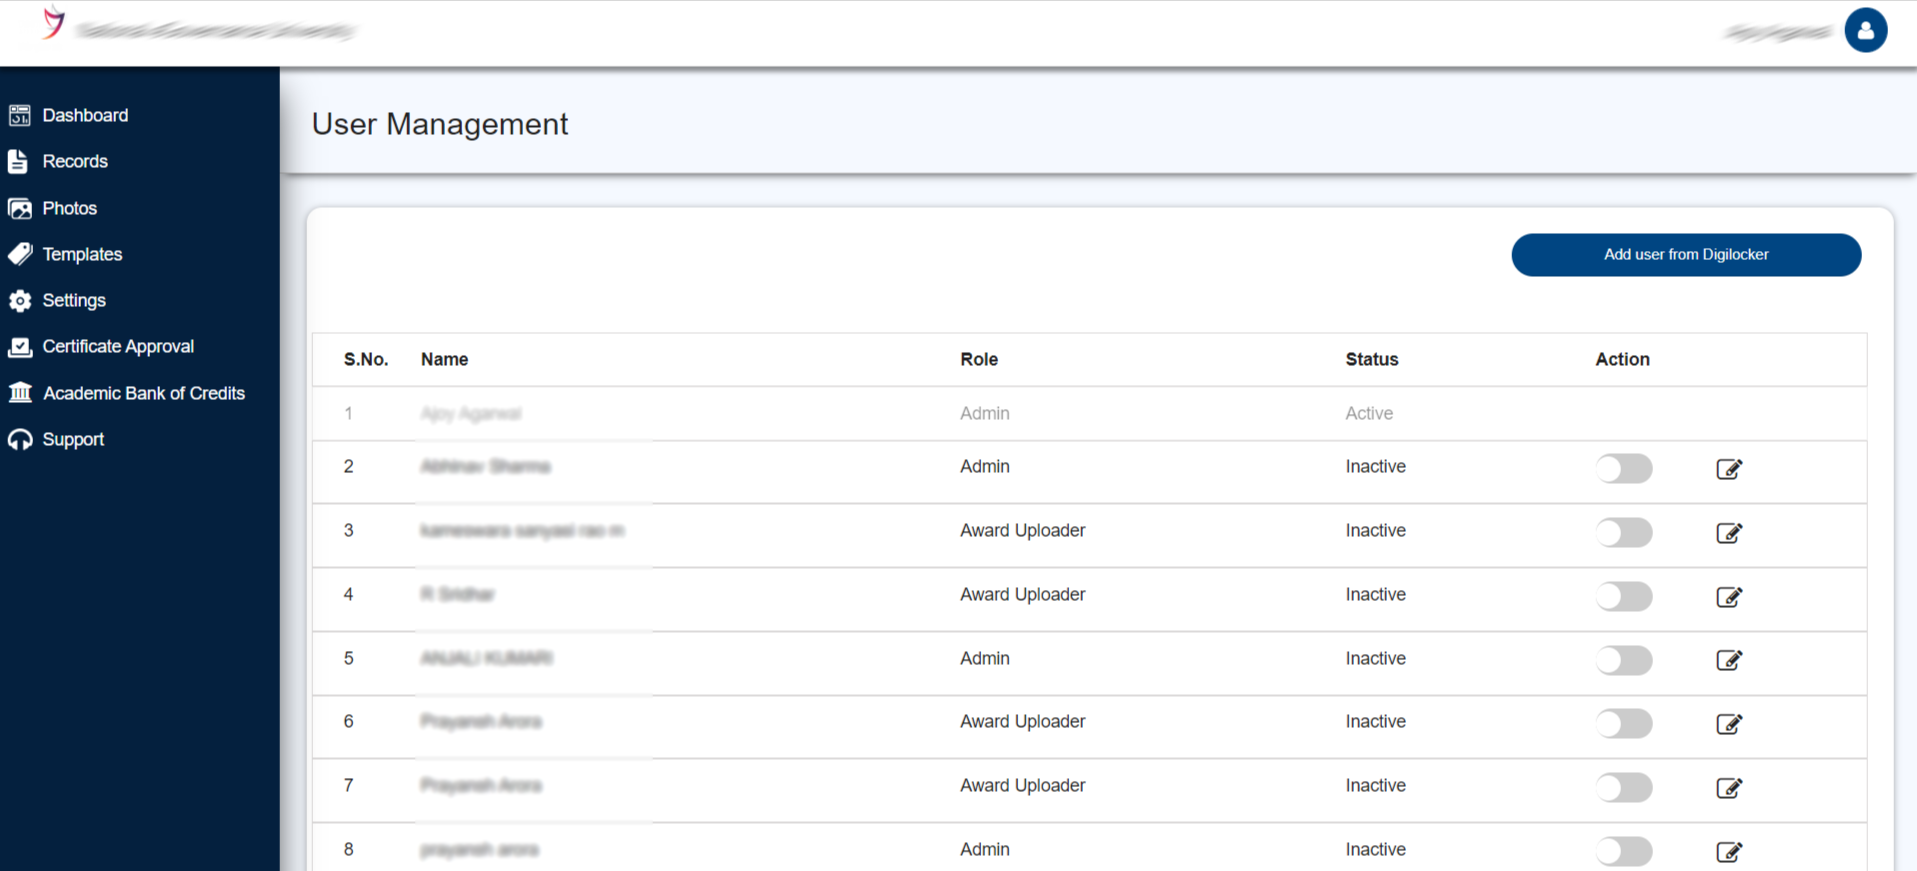
Note:Please ensure only the authorized person of your institution accesses the user Management system.DigiLocker NAD will be responsible for any changes or modification under this section.
 Government of India